Assigning accounts to groups
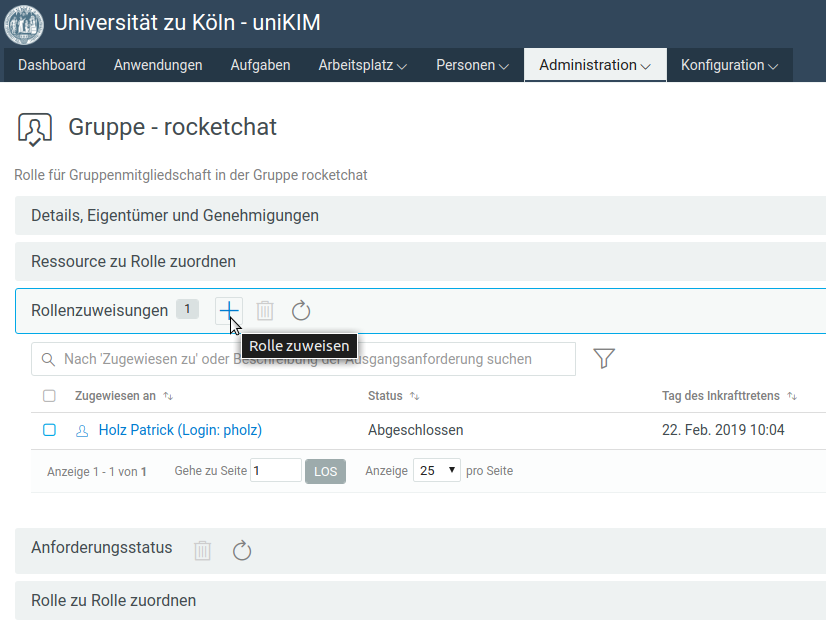
1. Choose the group that you will want to assign a new member to. Click on the group name to open a new pop-up window.
2. Click on the Assignments tab.
3. On the left hand side, click on “Assign…”.

4. A new window is opened.
In the box labelled “Initial Request Description”, enter some text that will help you remember later why you made this assignment. It is recommended to include the account name of the person you are assigning privileges to in this description. For example, you may enter John Doe (jdoe2) added to project at the very beginning.
In order to add the name of the selected person the the “Select User(s)” box, click the magnifying glass symbol next to it.
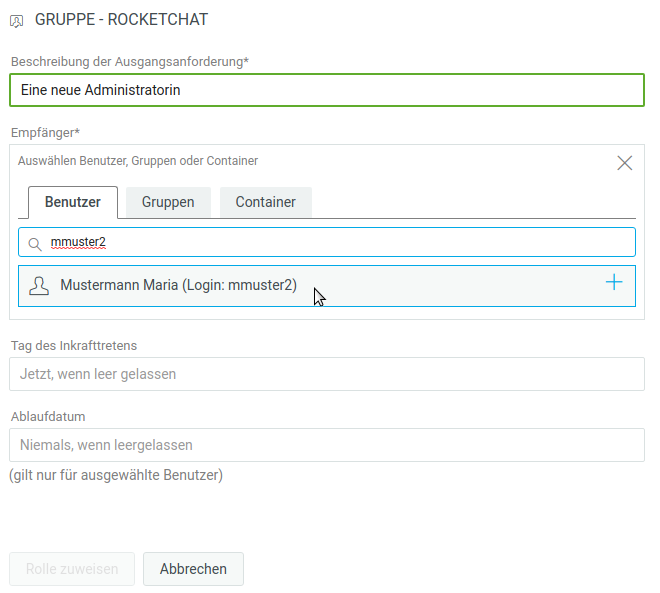
5. In the new window, enter some search criterion to search for the intended account name. If there are several people by the same name or if one person has got more than one account, there may be more than one search result (see example screenshot). Tick the appropriate box of the intended account name.
6. Click the Select button to confirm.
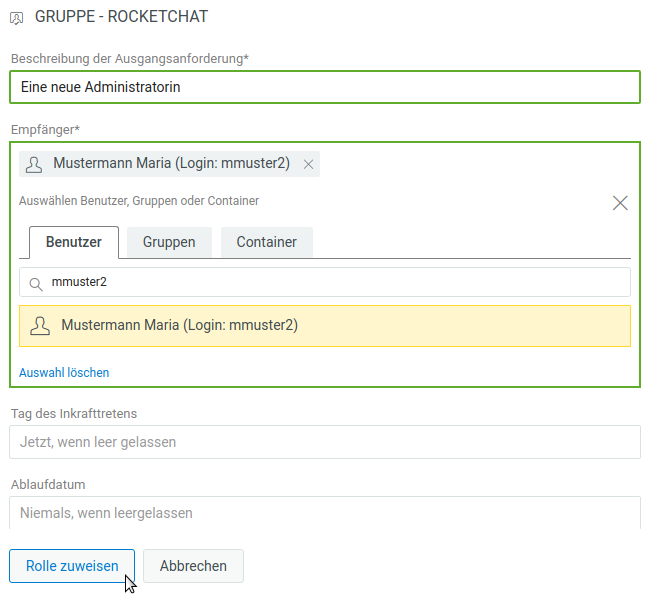
7. If the correct person is displayed in the “Select User(s)” box, click the Assign button to continue.
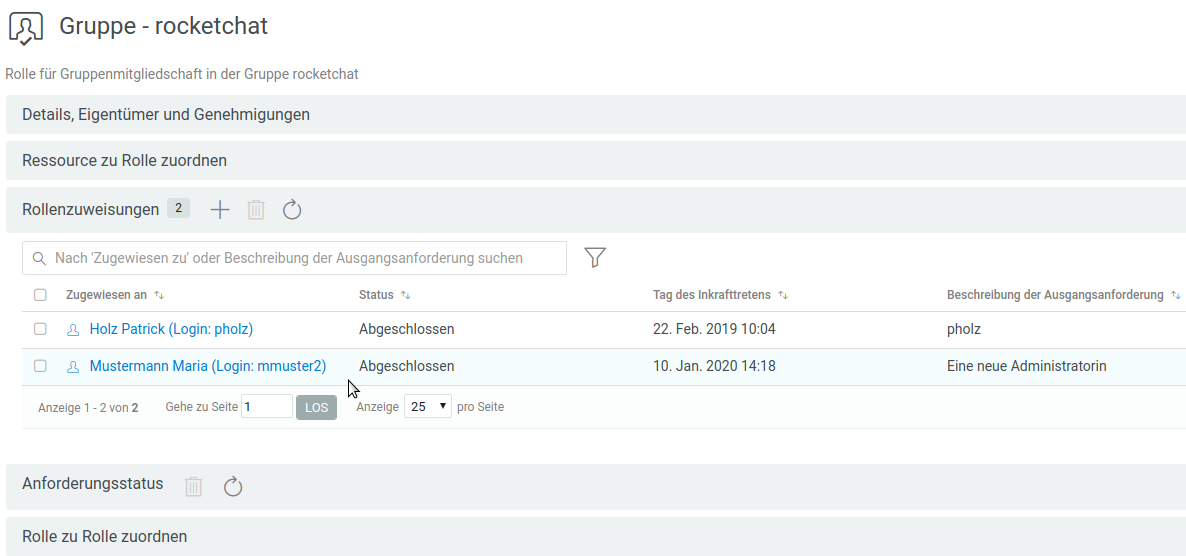
8. When the name is displayed in the list of assignees, the account has been added to the group.
Please note that it may take some time for this change to become effective.
Contact
If you have any questions or problems, please contact the ITCC-Helpdesk