Configure DEP profile
Preface: Reasons for adding to the DEP
In order to use the full functionality of the remote maintenance of mobile Apple devices, it is strongly recommended to add the devices to the so-called Device Enrollment Program (DEP) of Apple. This will automatically register the devices with the Apple School Manager at the University of Cologne. If you are planning to purchase new devices, you have the possibility to order them directly from the reseller for a fee. Especially for large orders this is highly recommended. If you already have devices in your inventory, if new devices are added individually or if devices have been donated, for example, you can also add the devices manually to the Apple School Manager. However, this only applies to iPads and Apple Tvs; Macs cannot be manually re-registered using Apple Configurator.
If you plan to use a / our Mobile Device Management (MDM) Jamf School to manage the devices, you don't necessarily need to add the devices to Apple School Manager or DEP, but it is strongly recommended as only automatic device enrollment (formerly Device Enrollment Program, DEP) prevents users from removing the MDM profile from the devices. Other restrictions and device configurations can also only be configured on supervised devices. For more info on this, please also refer to the Jamf doc on device enrollment. Nevertheless, "non-supervised / supervised" devices can also be extensively supervised in Jamf School.
These profiles are installed on every device that is managed by an MDM. Only by means of these MDM profiles remote control works correctly. The possibility to delete these profiles on the user side is therefore counterproductive.
If the devices are added to the DEP of the Apple School Manager of the University of Cologne, this is prevented.
The DEP is also the registration method recommended by Apple. Only through automatic device enrollment can you fully utilize all the device management features available in Jamf School (or indeed other MDMs). For iPads, for example, this concerns the single app mode or other restriction options that are of interest to many users. Furthermore, the devices are clearly marked as property of the university and individual institutes / projects and can be locked and located in case of loss or theft.
Note: For manually added devices to the Apple School Manager there is a transition period of 30 days. Within this period, you can unlock the device again and remove it from School Manager without any problems. Otherwise, it remains permanently in School Manager.
3 steps to the goal
The purpose of automated device enrollment (DEP) is to automate the enrollment process. This prevents users from removing the MDM profile from the devices.
Only by assigning and distributing DEP profiles are certain performance and security features usable, such as kernel extension management. Also other functions within Jamf School are linked to the devices being registered as "Managed / Supervised" via the DEP profile (e.g. Lockscreen Messages, Webcontent Filter, Single App Mode, Wallpapers, Layout Functions and certain Blocklists).
Registering devices via automatic device registration involves the following steps:
-
Create and configure a profile for automatic device enrollment.
-
Assigning a profile for automatic device registration to the devices.
-
Resetting / deleting the devices for it to take effect.
The Jamf School documentation also covers this topic in detail.
Create DEP profile


- Log in to the MDM Jamf School and navigate to Devices - Automated Device Enrollment.
- Check whether the relevant devices are listed under Automated Device Enrollment . Initially no profile should be assigned.
- Now click on the blue button "Automated Device Enrollment" to create a new DEP profile. Alternatively, you can navigate there directly via the modules in the sidebar(Profiles - Automated Device Enrollment Profiles).
- Select the operating system for which a DEP profile is to be created.
Configure DEP profile
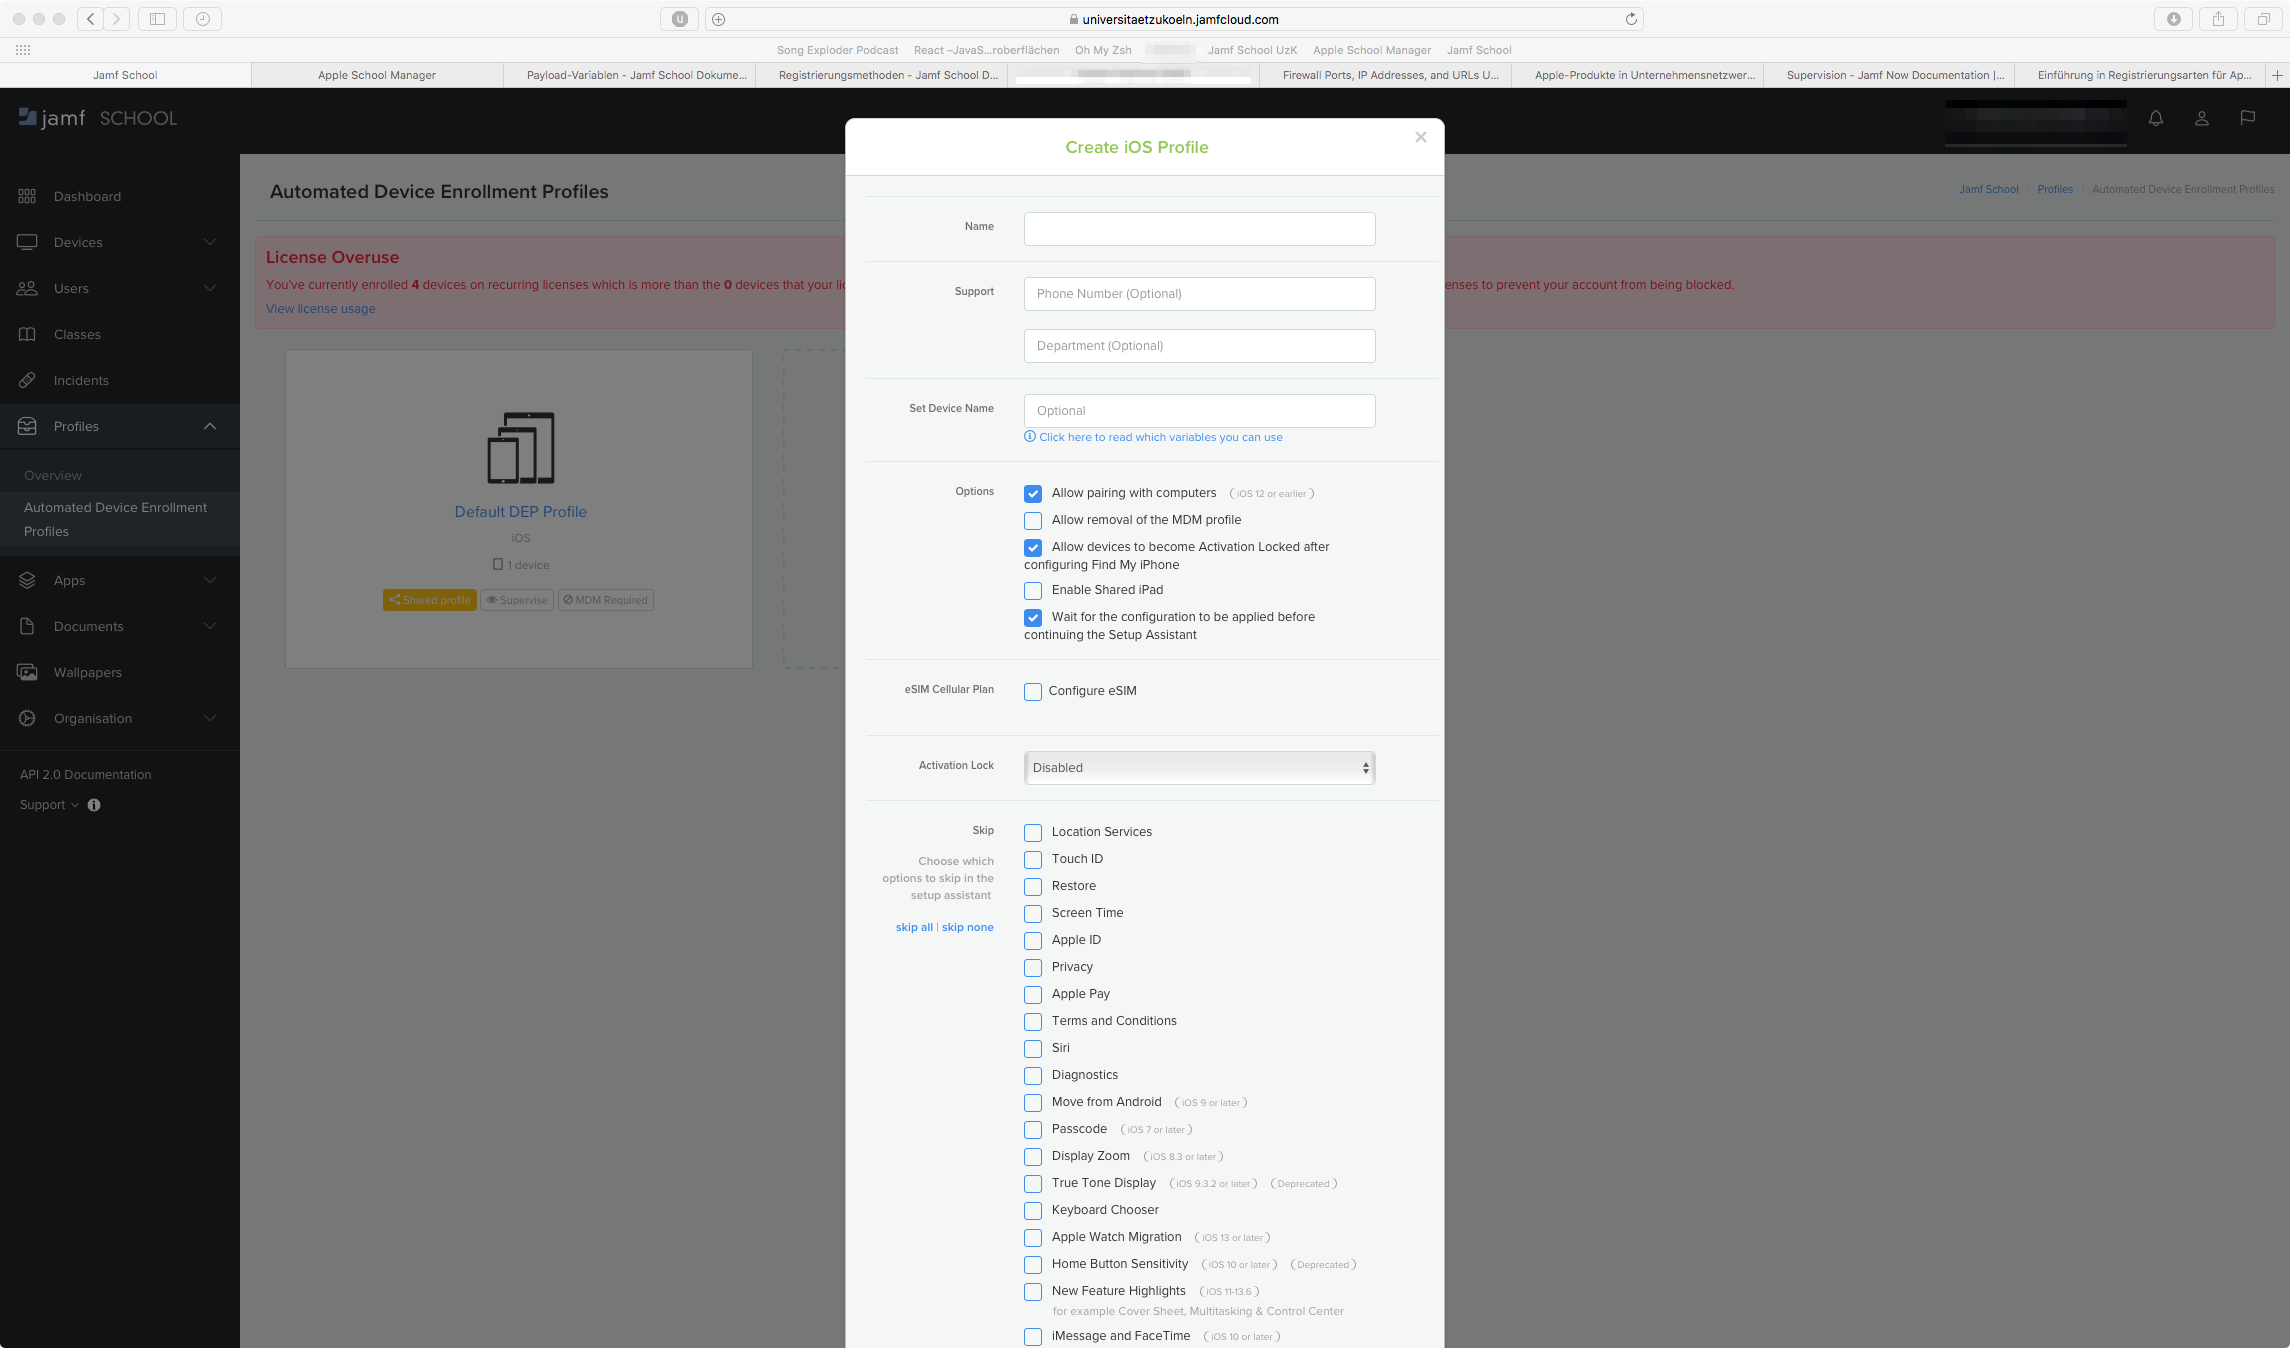
- When creating the profile, select the registration points that meet your needs.
- The more points are selected, the more the device skips. This makes the initial configuration a bit faster.
- However, be sure to skip the"Assign license" item. This would fail anyway. Assign licenses is reserved for the admins.
- Urgent recommendation: at the point"iOS Setting" - Allow removal of the MDM profile DO NOT hack. Only by omitting this hack you grant the permanent availability in the MDM of the device.
- Inaddition, the recommendation: at the point "Onboarding" - do NOT select the point"Require authetification", because a connection to an identity system is not given here.
Assign DEP profile to the devices
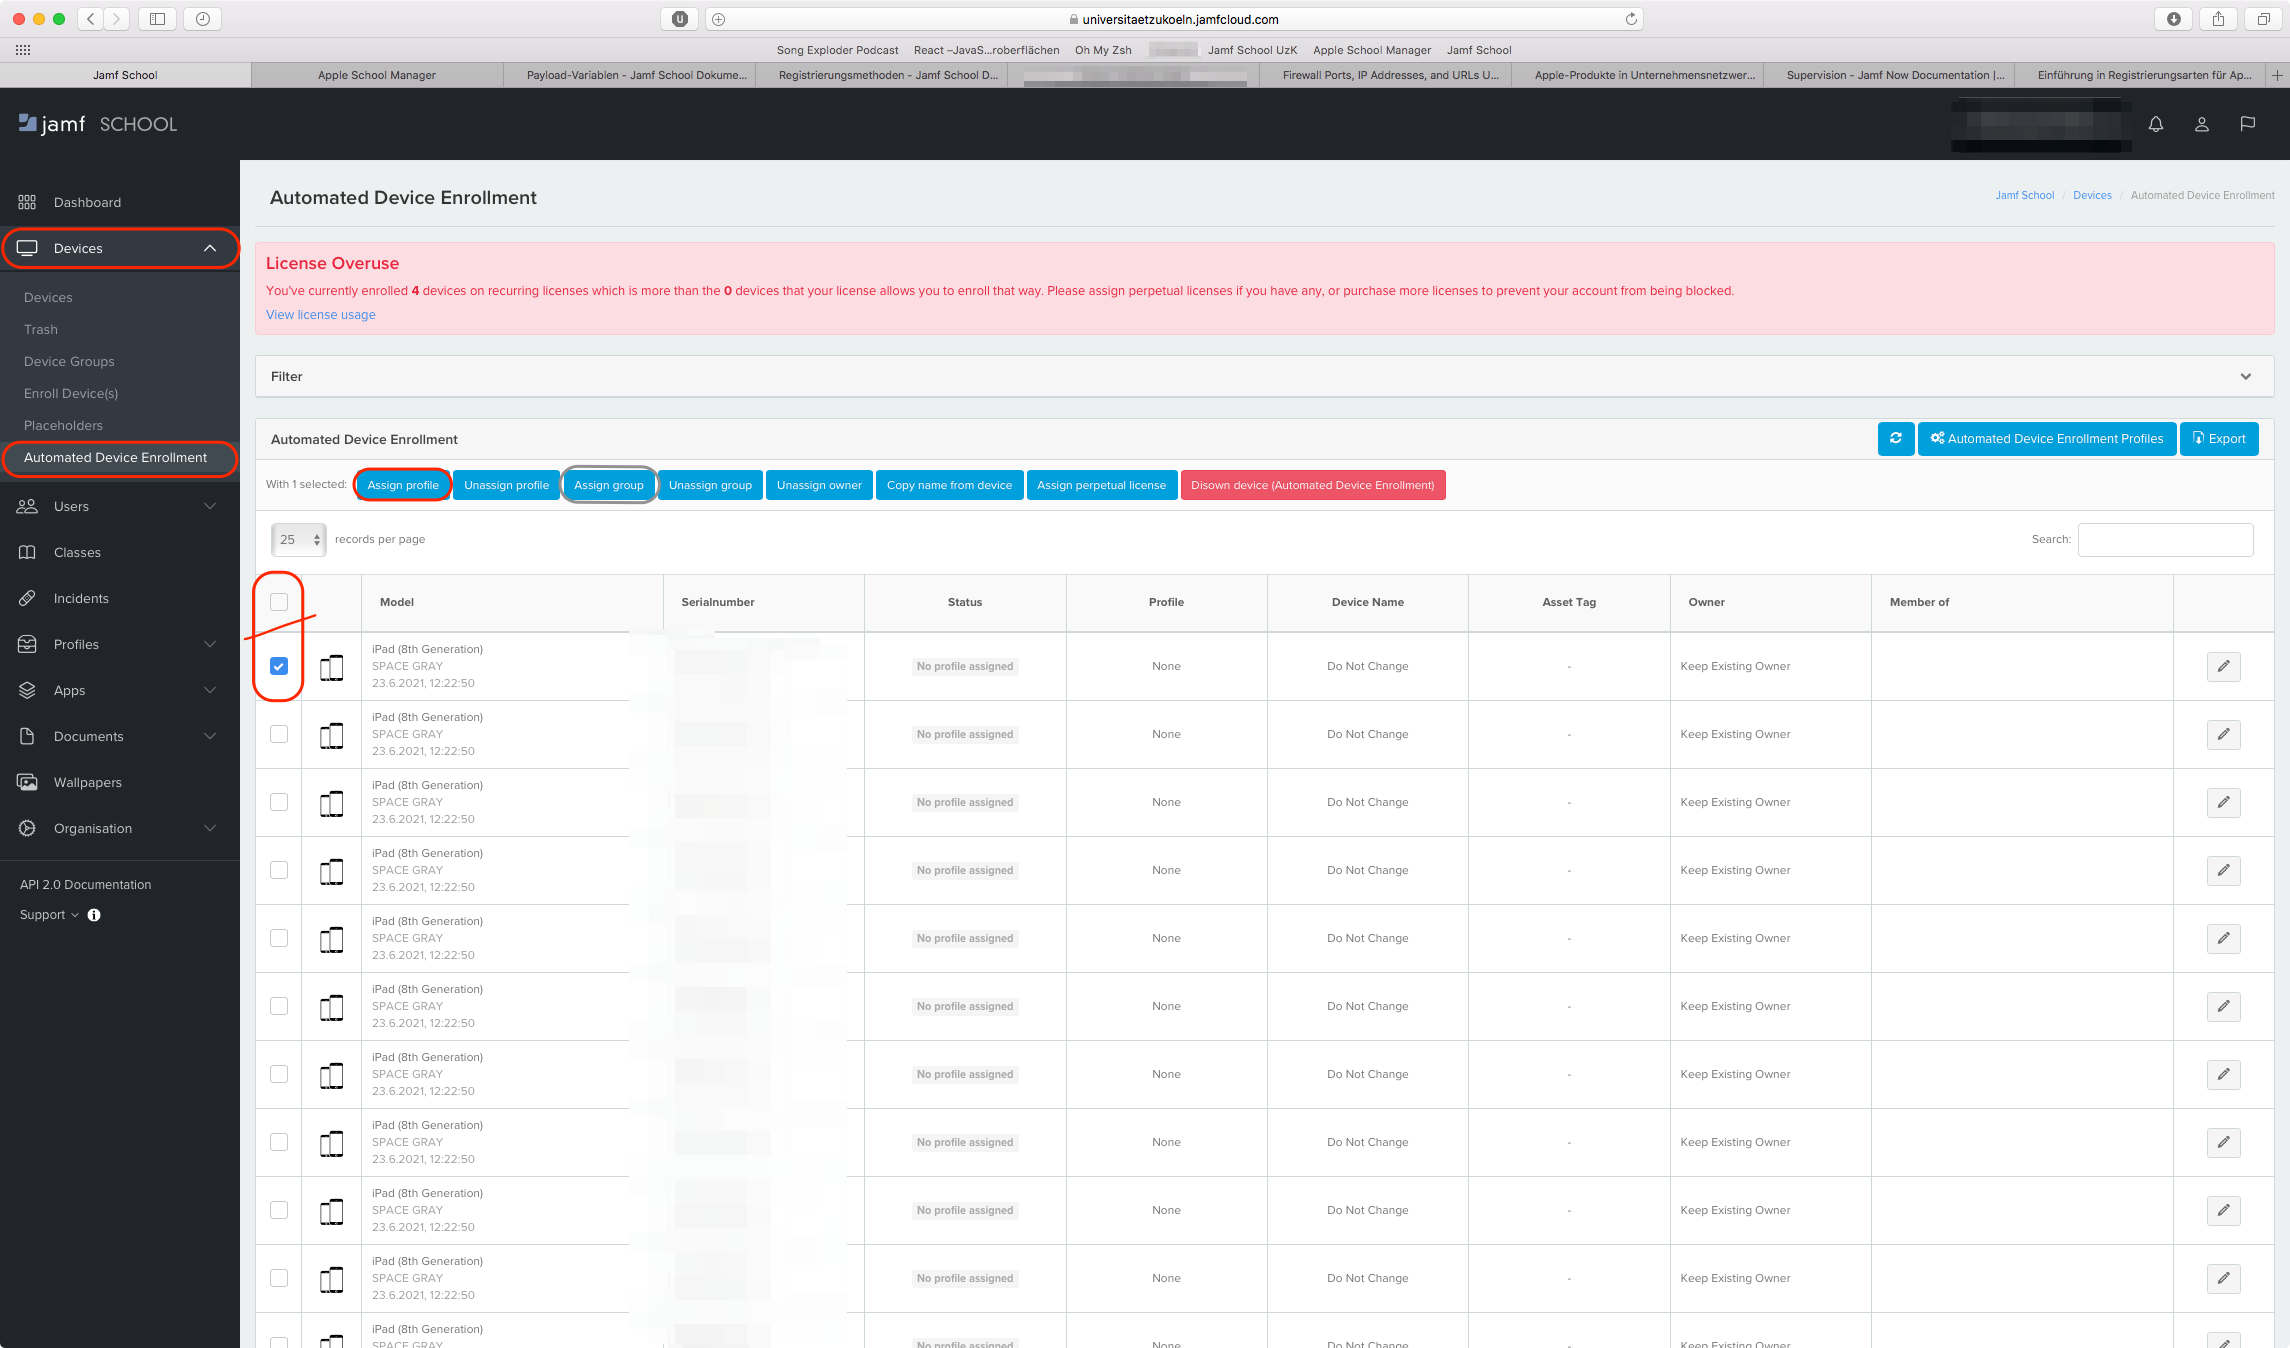
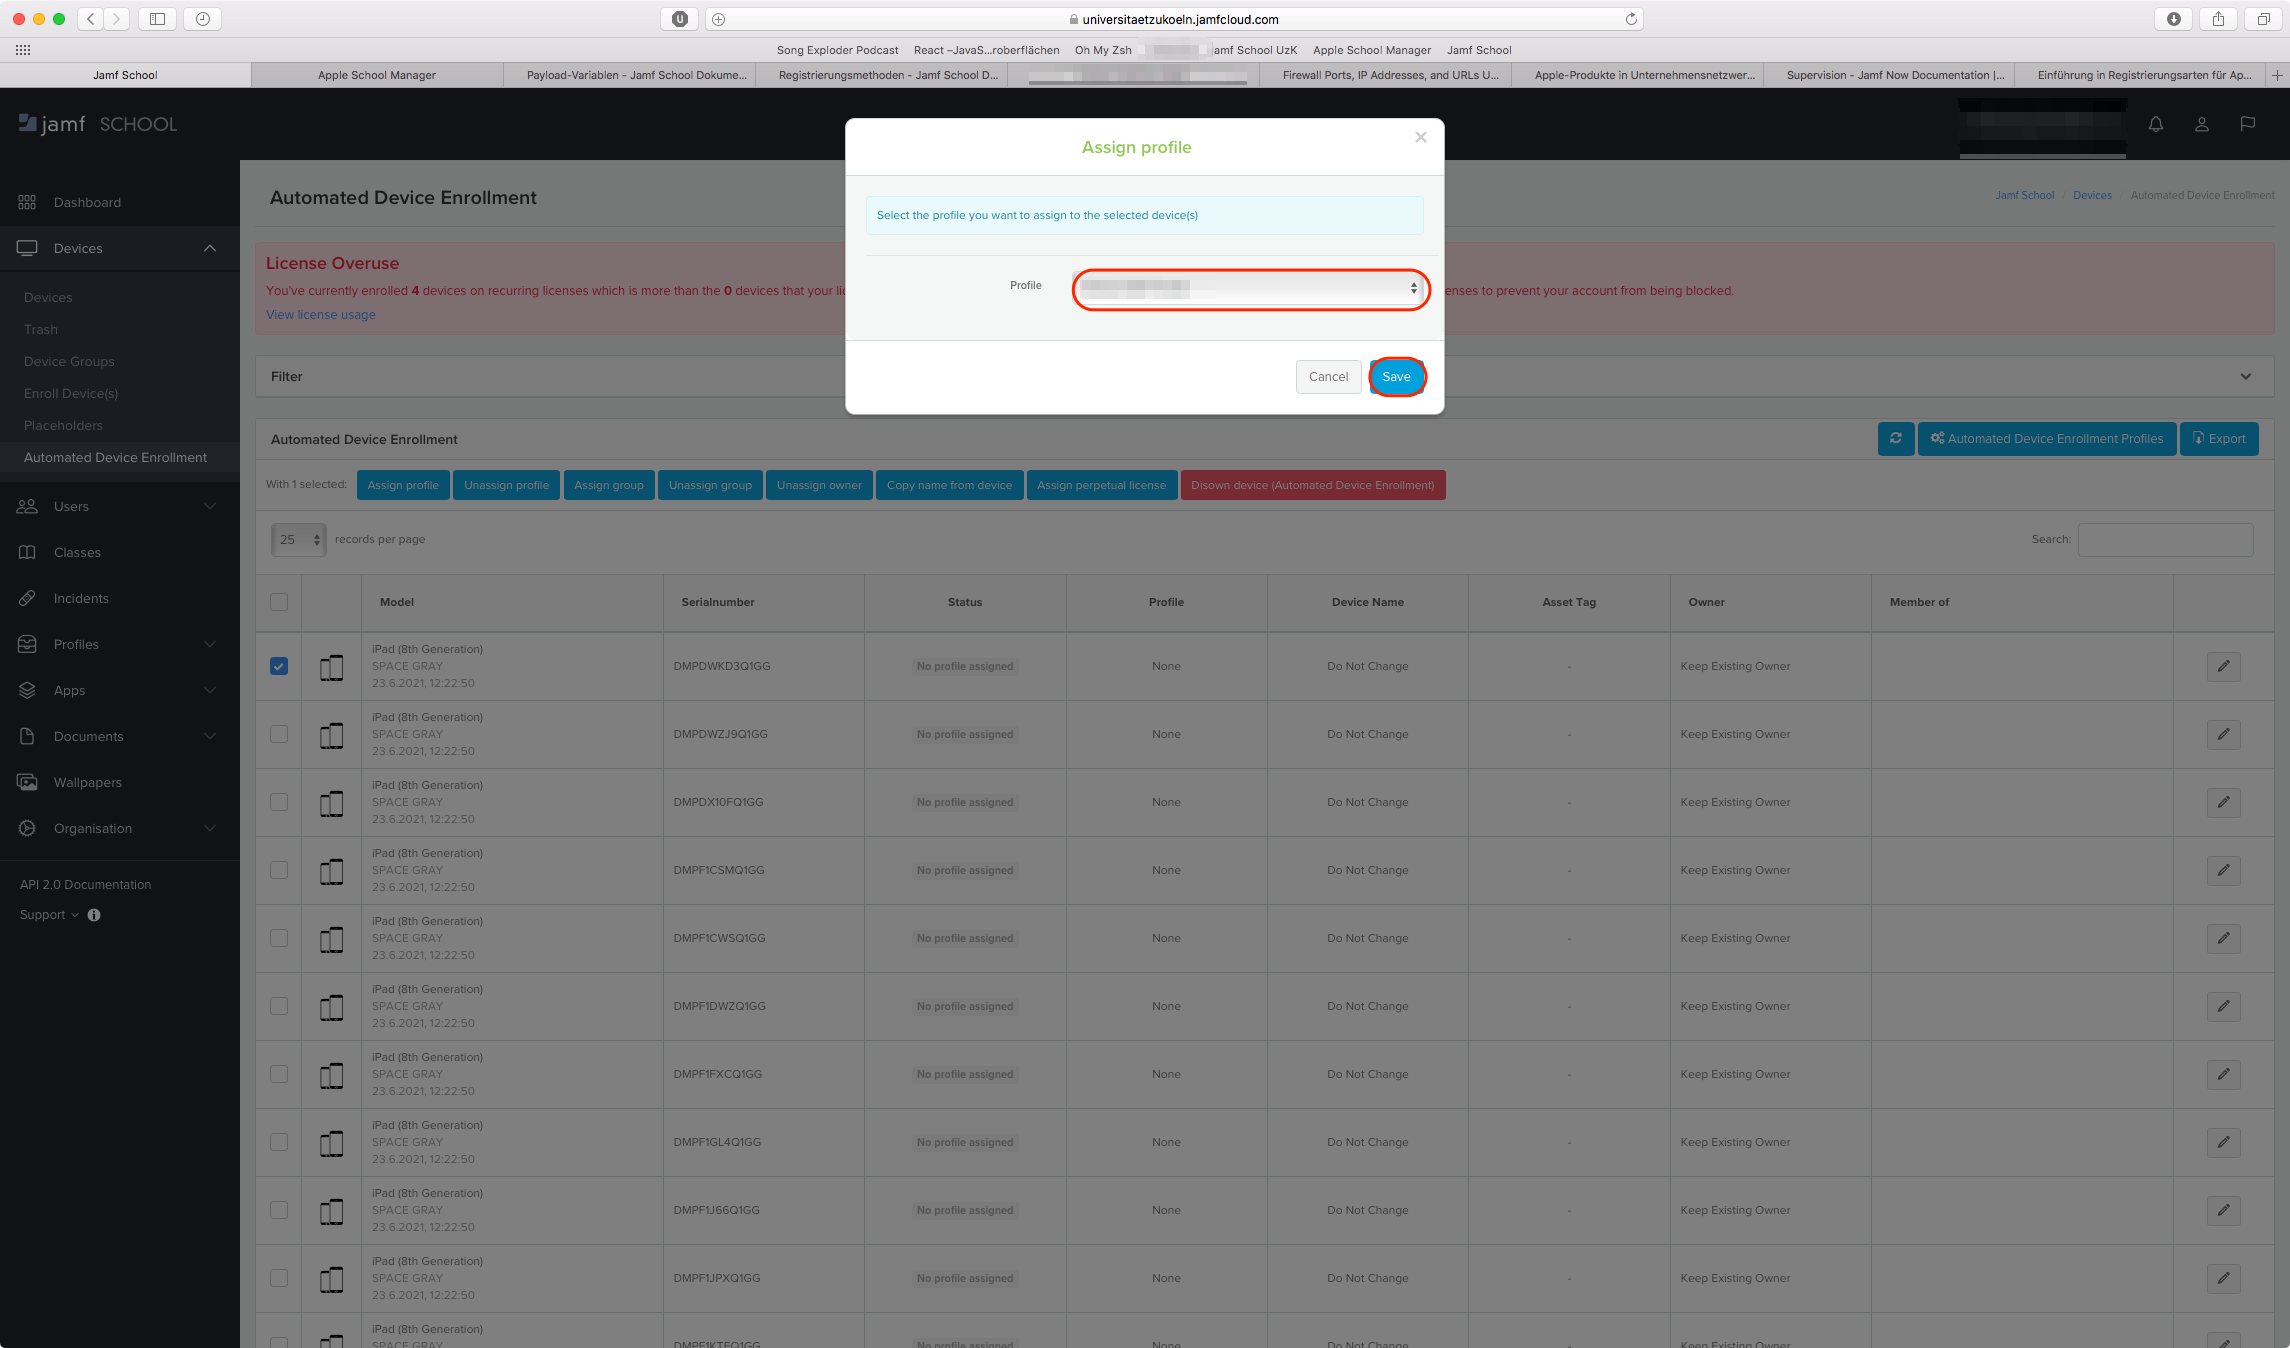
- After successfully configuring the DEP profile, the assignment follows.
- Select one or more devices to which the profile is to be assigned. The easiest way to identify the devices is via the serial number in the search field.
- After selection, various assignment buttons appear. Important here is initially the"Assign profile" button. Optionally, you can also assign groups and locally created users directly to the devices.
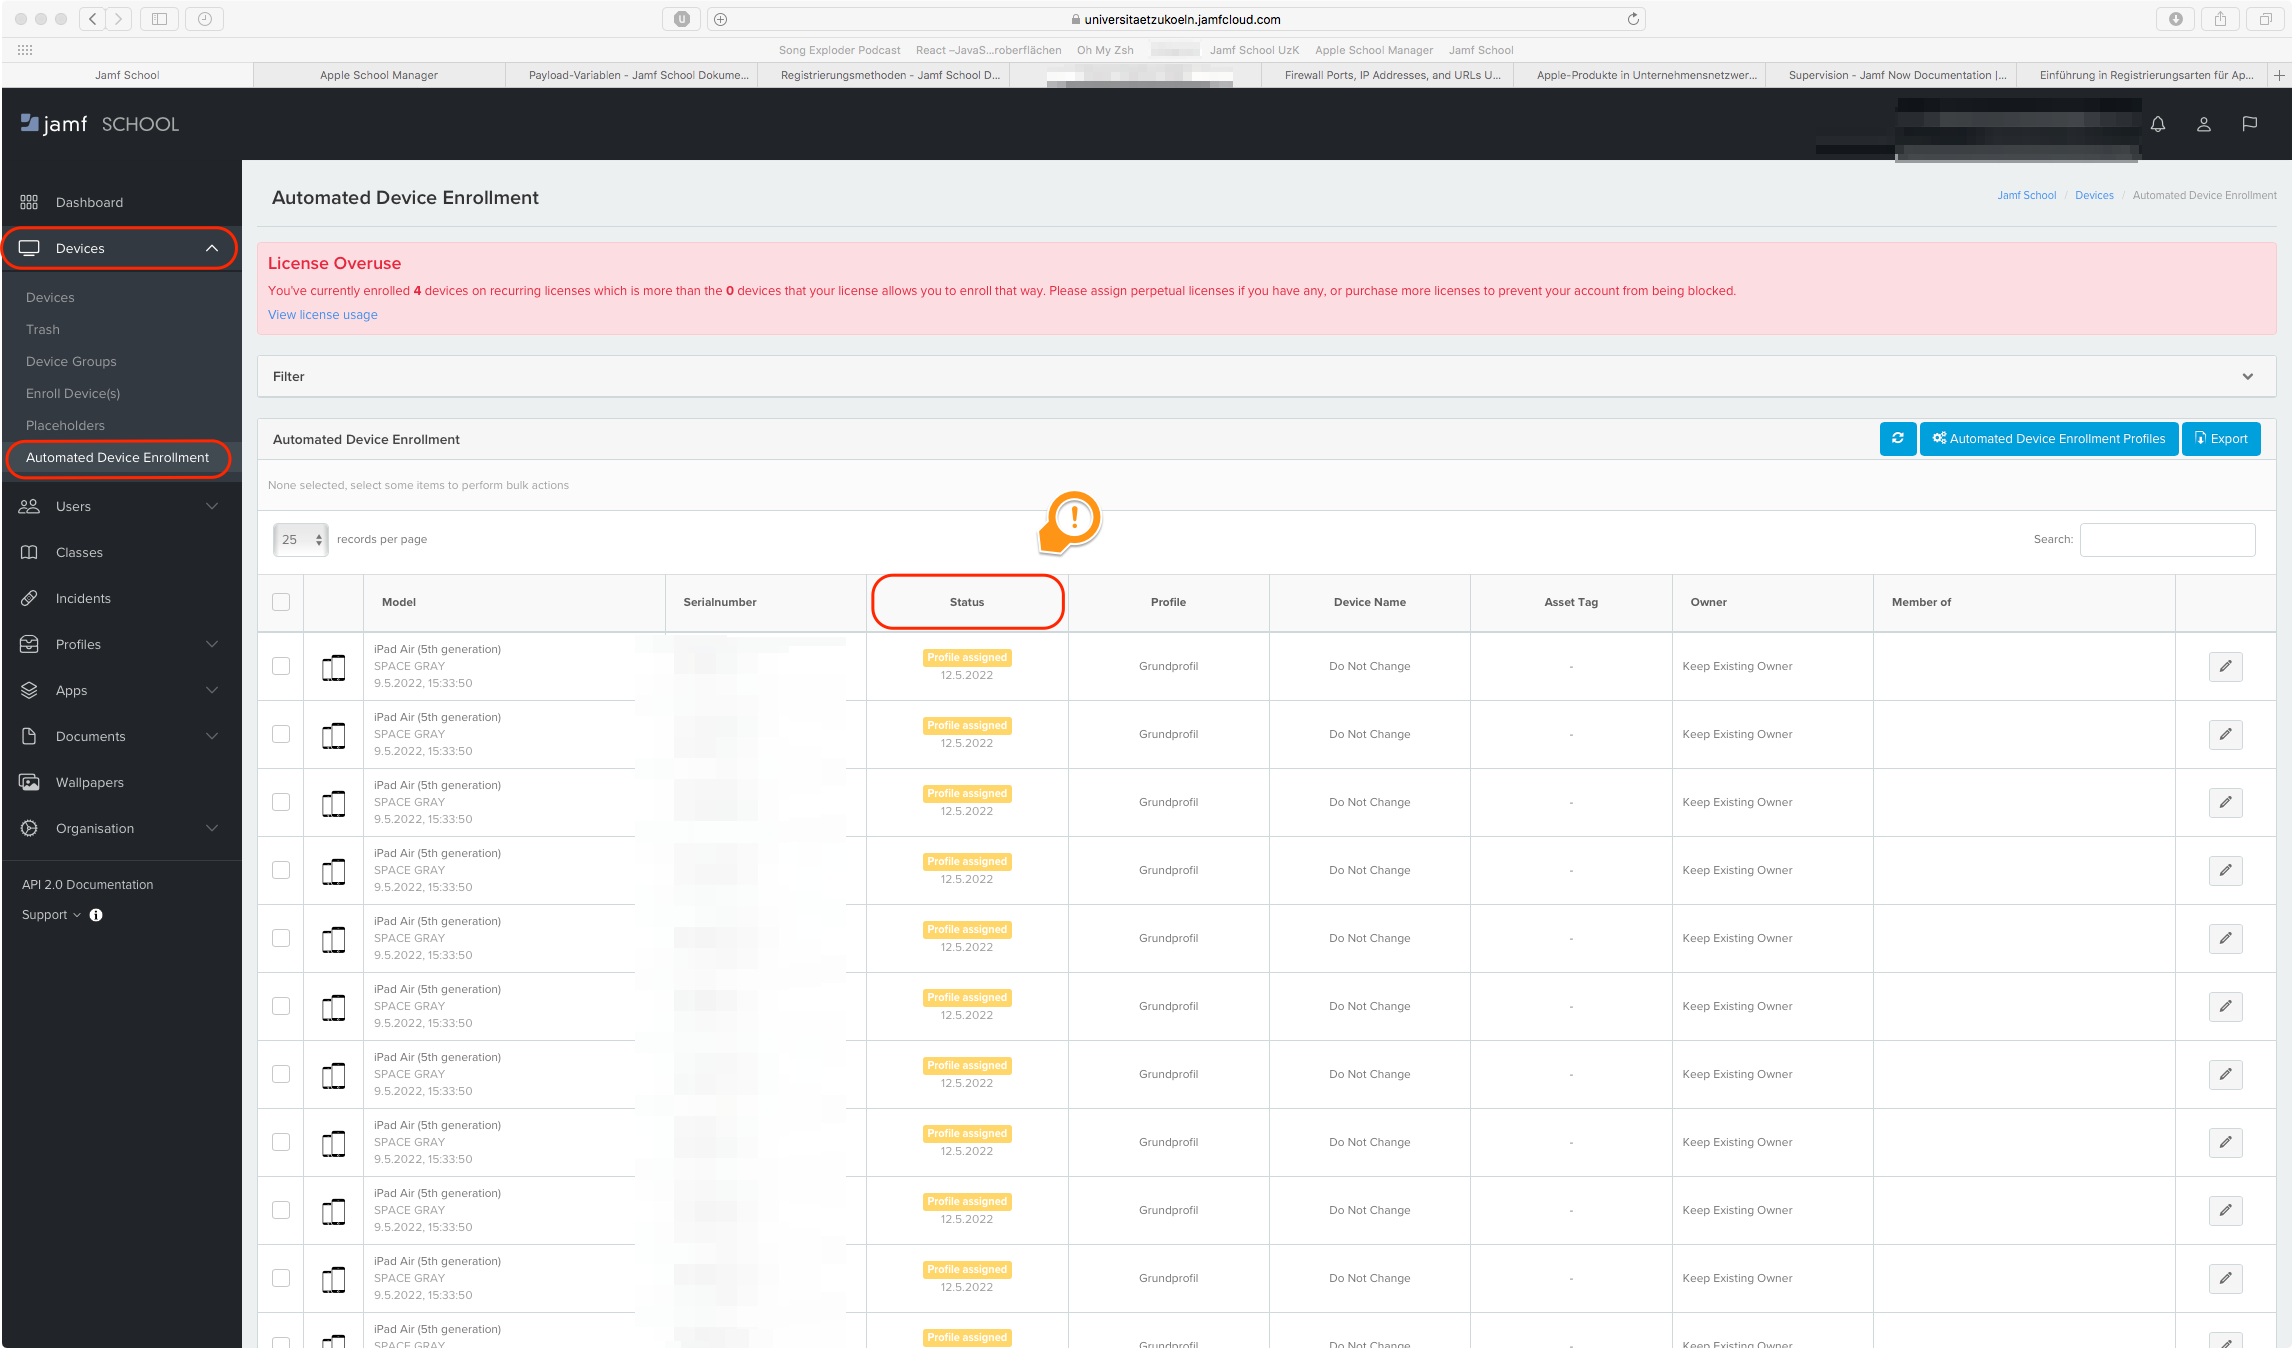
- After successful assignment, the devices should be marked with the yellow label "Profile assigned".
- Info: All changes assigned in this way will only take effect after the devices have been reset / deleted once!
Reset the devices in the device details
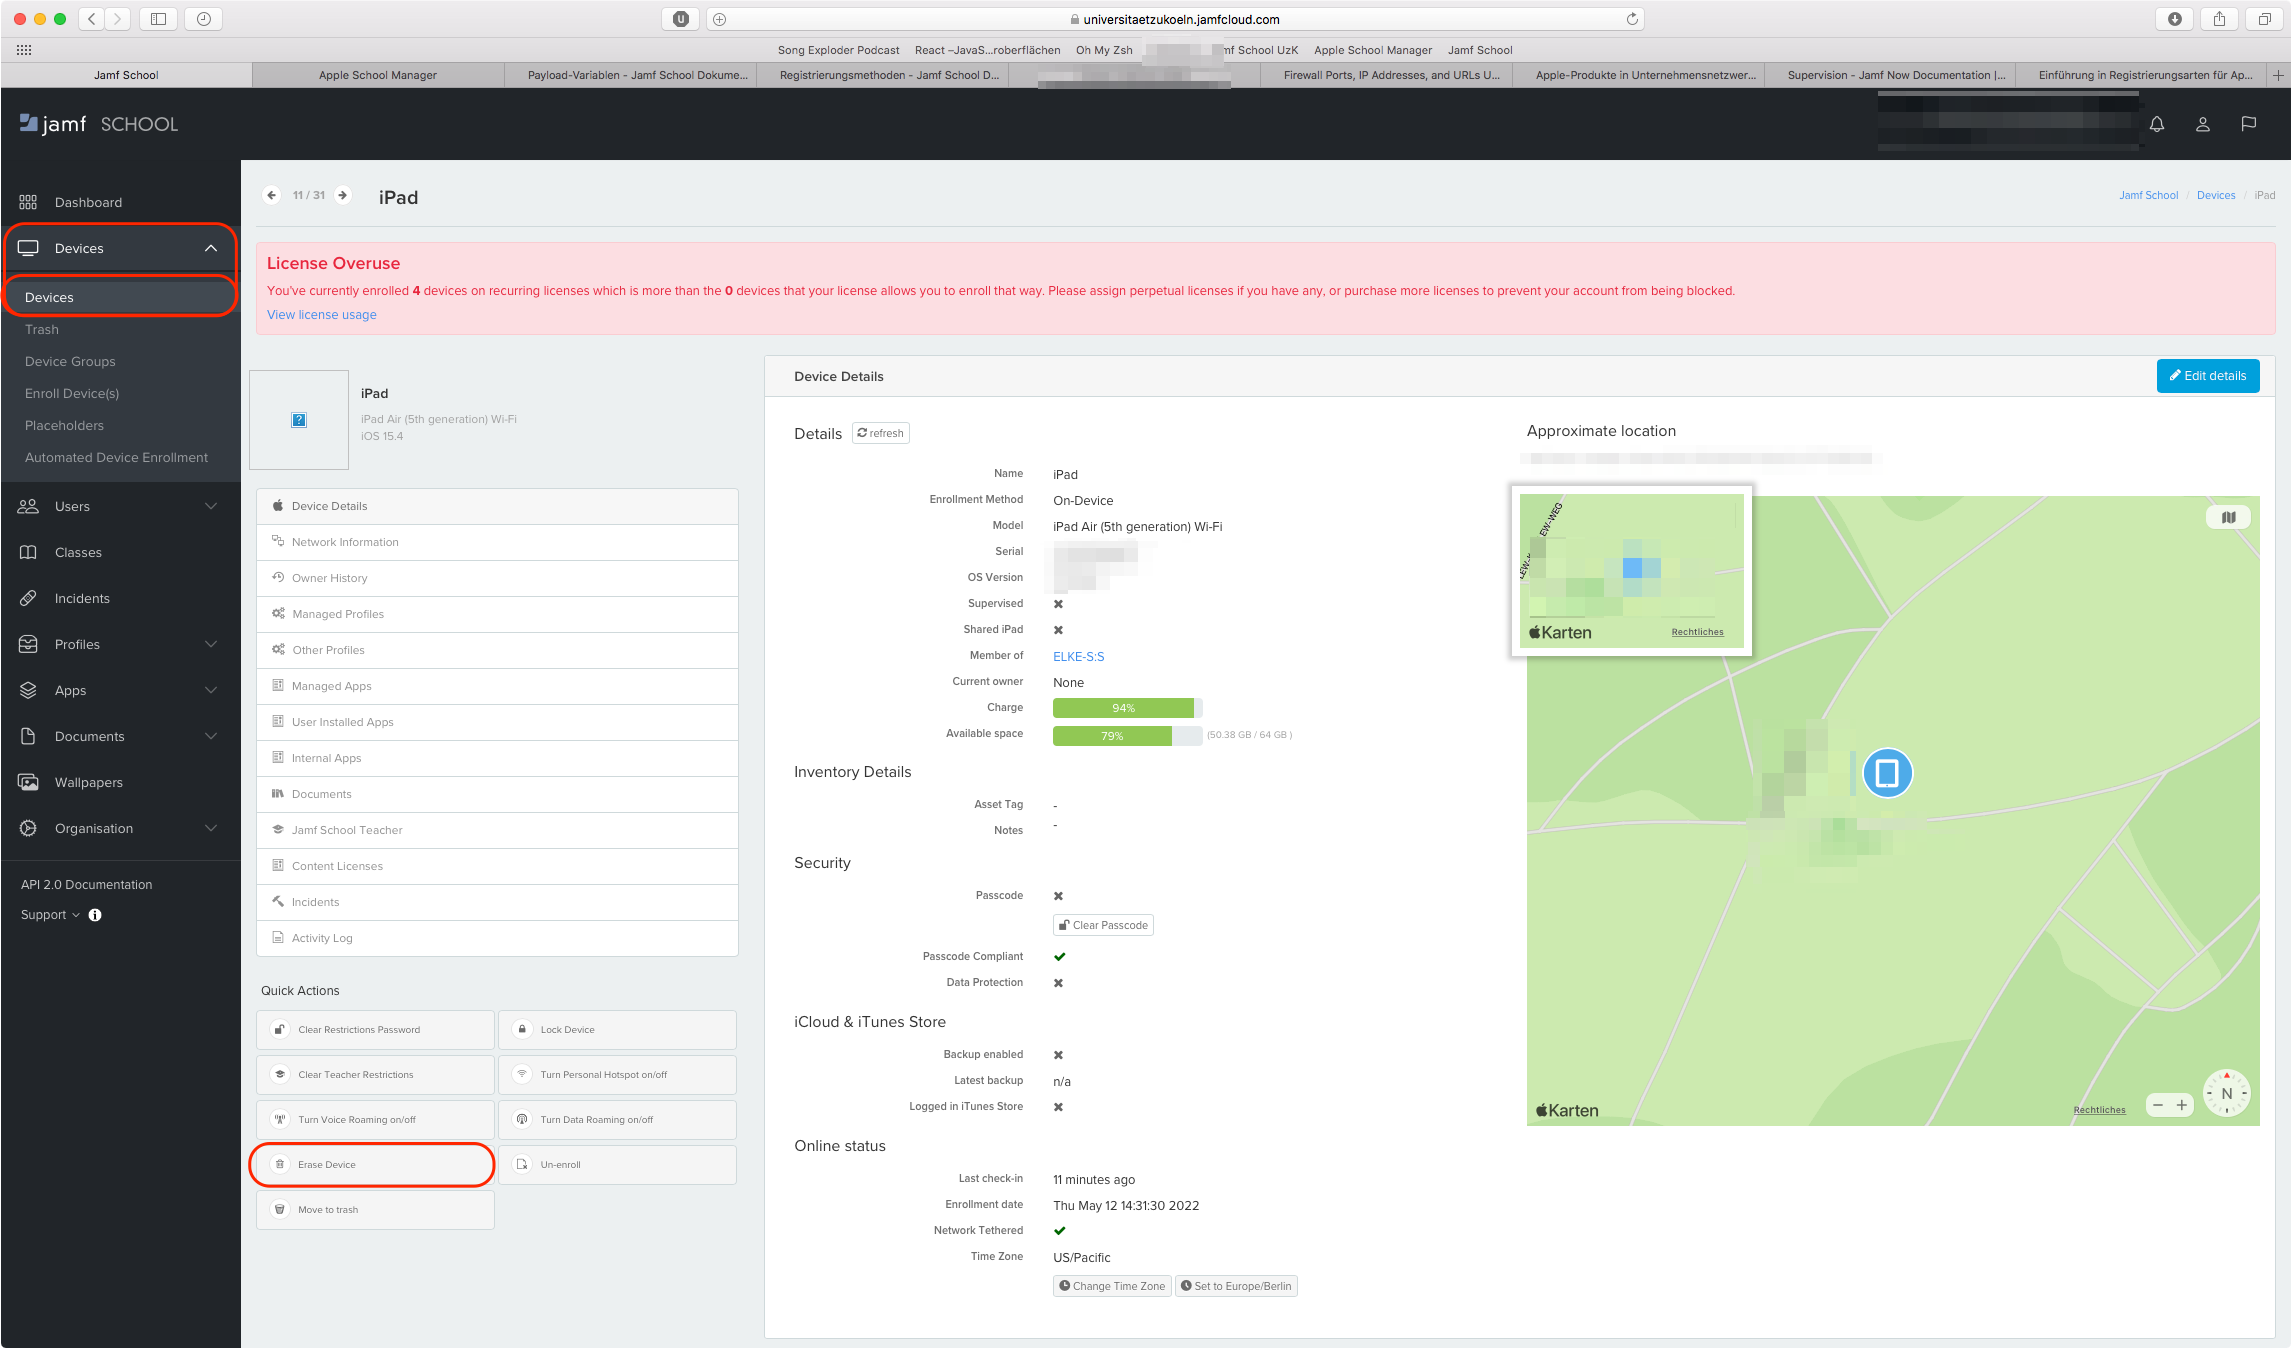

- Now go to the device details of each device.
- Click on "Erase Device".
- On the device in question, make sure that the erase process has been triggered. (Apple screen with loading bar)
- Initial Unfortunately, an internet connection must be manually established once on the device. (e.g. with the open Uni-Koeln WEB network and the one-time login. Alternatively, any other open network / home network).
- After that the WLAN profiles with the configuration for a permanent internet connection can be pushed directly to the devices via Jamf.
- If the process was successful, you should see your device marked with the blue "Sperviced" label in the device details. If not, repeat the process if necessary.
- Now you can proceed with further configuration of the devices entirely through Jamf - deploying apps and other configurations.
Contact
If you have any questions or problems, please contact the ITCC-Helpdesk