Setting up and using the certificate in Apple Mail
Importing the certificate into the keychain
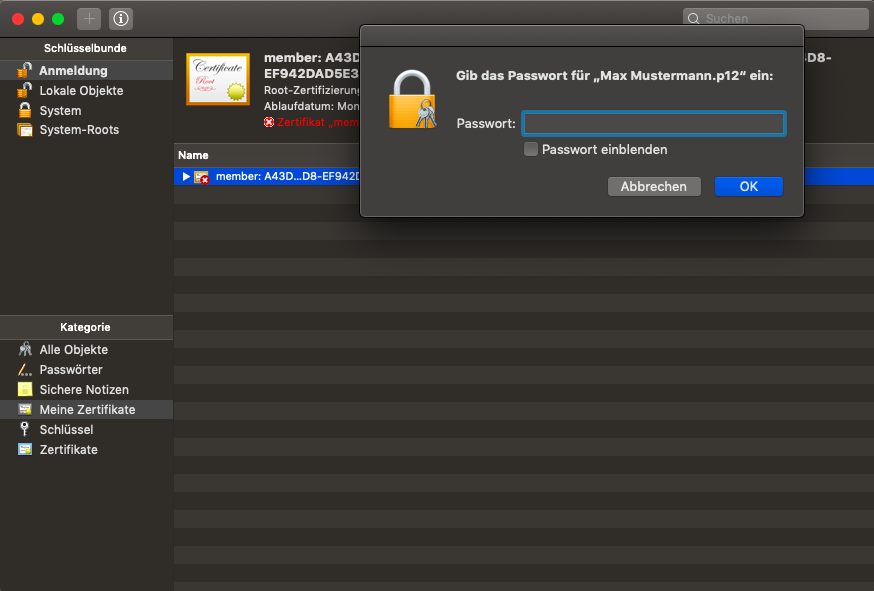
The S/MIME certificate must be imported into the macOS keychain so that it can be used by Mac Mail.
- Click on the previously exported certificate file (also on another computer if necessary) and enter the corresponding password. The certificate will now be imported into the keychain management.
- Enter your password for the keychain when you are prompted to do so.
Sign e-mail:
- Compose a new e-mail in Mac Mail.
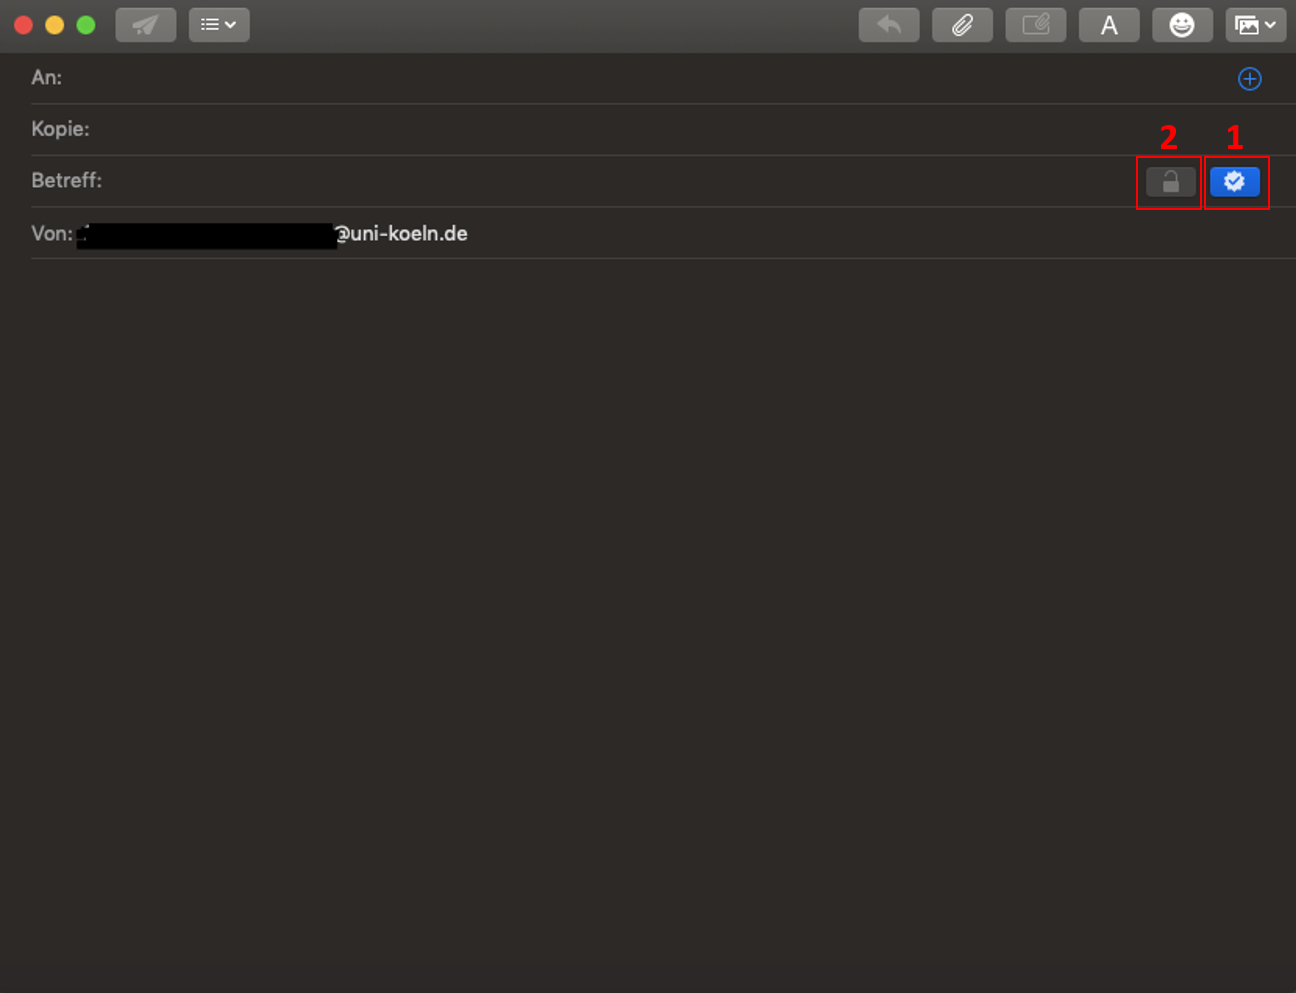
- Click on the "Sign" icon in the toolbar (looks like a tick in a circle) (1).
- Make sure that the correct certificate is selected to sign the email.
- Send the email as usual.Mac Mail saves the setting automatically so that you do not have to select the symbol again when you send another email.
Encrypting an e-mail
To send an encrypted email to a recipient, you must have received the certificate from this person. If the person also certifies the mails, Apple saves the certificates automatically so that an additional import is not necessary.
- Compose a new email in Mac Mail.
- Click on the "Lock" icon in the toolbar (looks like a closed lock). (2)
- Select the recipients of the e-mail.
- Click on "Send".
Emails in Mail from iOS
You must first transfer the certificate to your device (e.g. by email or cloud), as it is not possible to apply with iOS.
Emails in Mail from iOS
Import:
- Navigate to the "Settings" on your iPad/iPhone. Select the first menu item "Profile loaded"[Fig. 1].
- Click on the file and confirm the installation in the new window [Fig.2].
- Now enter the password for your iPhone/iPad [Fig.3].
- Click on "Install" again in the following window [Fig.4] and then also confirm this with "Install"[Fig. 5].
- Enter the password for the certificate assigned during export [Fig.6].
- Complete this process with "Done" [Fig.7].
Configuration of "Mail"
- Now navigate to "Passwords & Accounts" in the settings (in earlier iOS versions, go directly to "Mail") [Fig. 1].
- Call up your university account there.
- Now click on "Account" [Fig. 2] and then on "Advanced" [Fig. 3].
- Under "Sign" (1) and "Encrypt by default" (2), you can now make default settings for all future emails [Fig. 4]. We recommend that you only make "Sign" the default setting. You should not activate encryption by default, as you probably do not have a certificate from all your contacts and it is only possible to send an encrypted email if you have the public certificate of the recipient.
- After you have clicked on "Sign", you still need to activate signing on the corresponding subpage [Fig. 5].
- Now click on the blue back arrow in the top left-hand corner and then on the arrow again on the top page. Then confirm with "Done" on the account overview page.
Important note for recipients of encrypted emails
Please make sure that you keep all certificates that were used to send you encrypted emails. If these are removed, the mails can no longer be decrypted.
Contact
If you have any questions or problems, please contact the RRZK-Helpdesk

