Setting up VPN on Mac OS
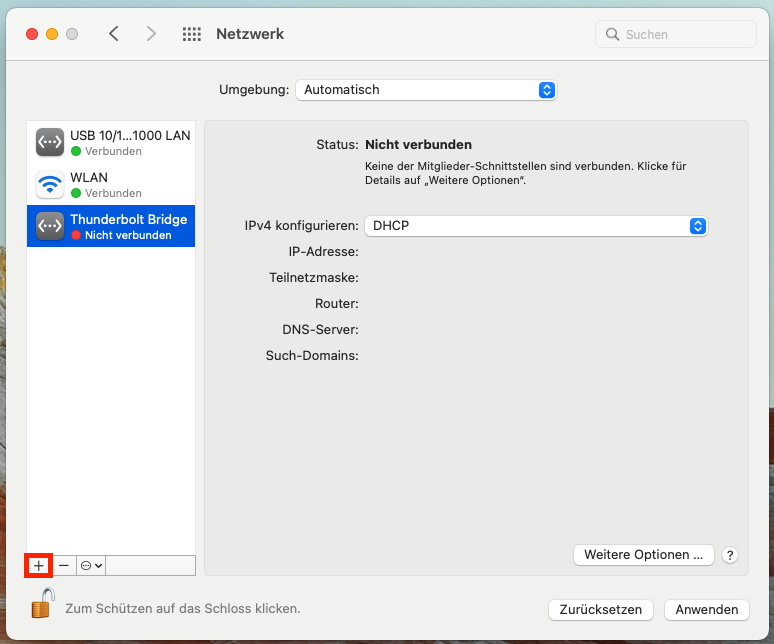
1. Open the "System Preferences" and choose "Networks".
click on "+" to add a new service.
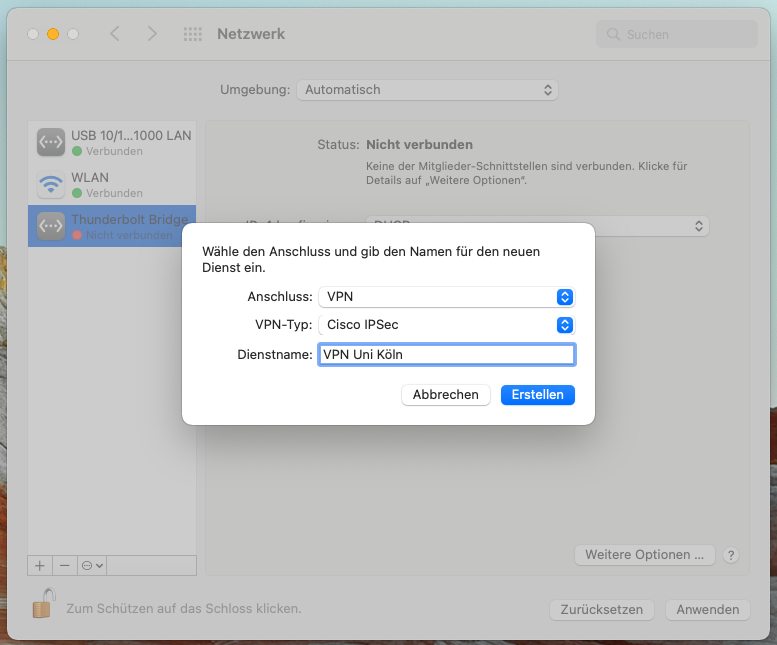
2. Fill in as follows:
Interface: "VPN"
VPN Type: "Cisco IPsec"
Service name: "name for your VPN service" (for example VPN UniKöln).
Click on "Create" to finish.

3. Now you have to adjust the following settings for the newly established service:
Server Address: vpngate.uni-koeln.de
Username: user-name of your student-, guest or employee account
Password: password of your student-, guest or employee account (see also accounts of the RRZK)

4. Now click on "authentication settings" below the field Username. Enter "
a. uklan" as the key for the field "Shared Secret".
b. "uklan-full" for your group name (or to connect via split tunnel: "uklan-split").
5. Click on "OK" to confirm.
The VPN connection was established successfully. Click on "Connect" to get connected to the UKLAN of the University of Cologne.

6. You can activate the VPN connection via the menu bar. Go in the network settings and set a check mark in "Show VPN status in menu bar."
It will create a new menu bar item "VPN Uni Köln" which you can select to connect.
Contact
If you have any questions or problems, please contact the RRZK-Helpdesk