Signing and encrypting with Thunderbird
Setting up the certificate in Thunderbird
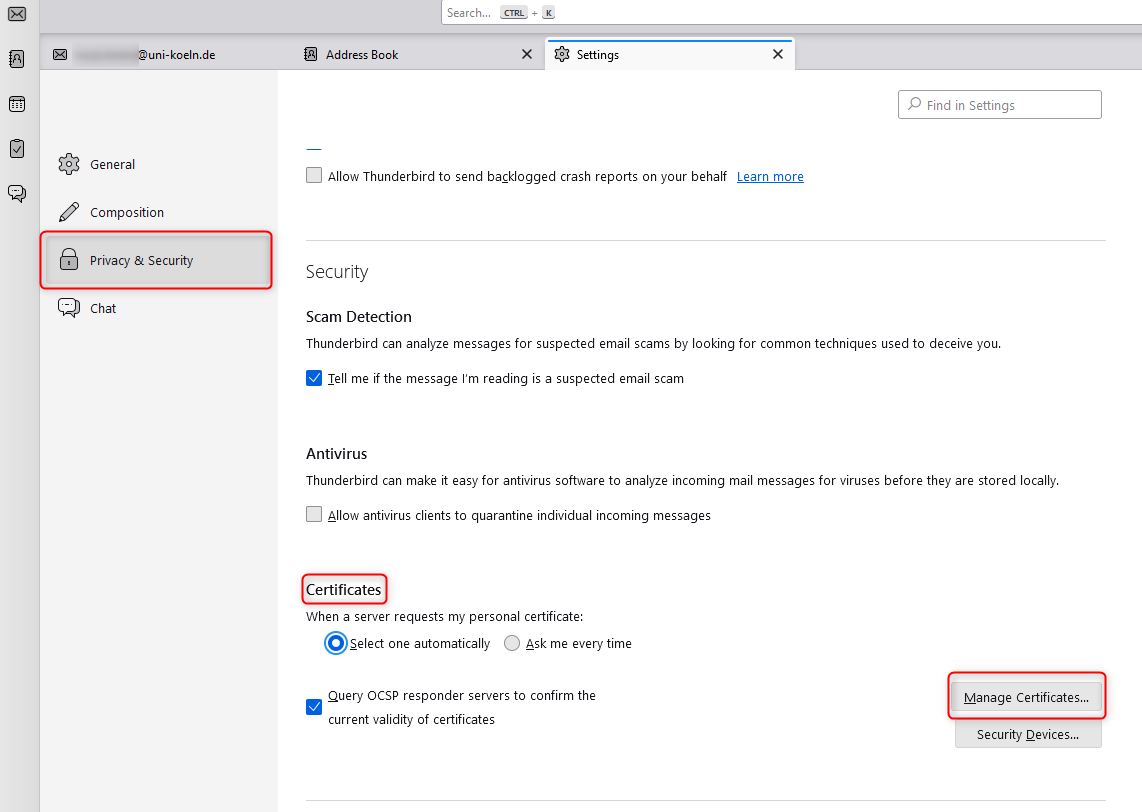
- Open Thunderbird and switch to the settings. Alternatively, you can access these via the three horizontal lines and then click on "settings".
- Click on "Privacy and Security" and scroll down to "Certificates" and click on "Manage Certificates":
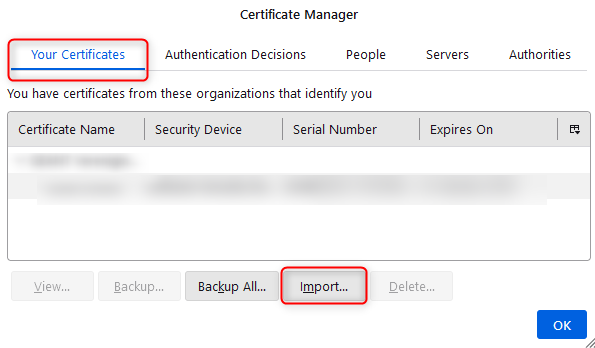
- In the new window, click on the "Your certificates" tab and then on "Import". Select the relevant certificate and click on "Open". Now enter the password and confirm the entry with "Log in". Once the certificate has been successfully added, click on "Ok" to finish.
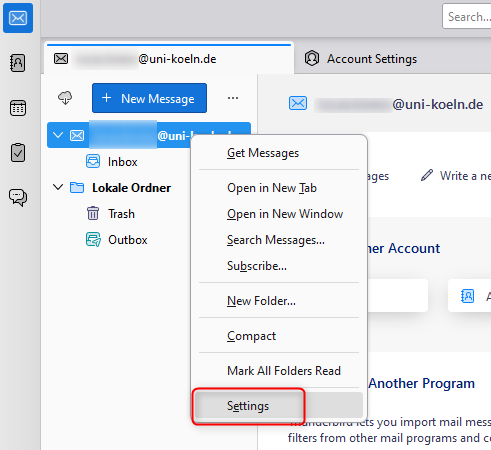
- Now change to the account settings. Open the context menu by clicking on your mail account in thunderbird with the right mouse button.
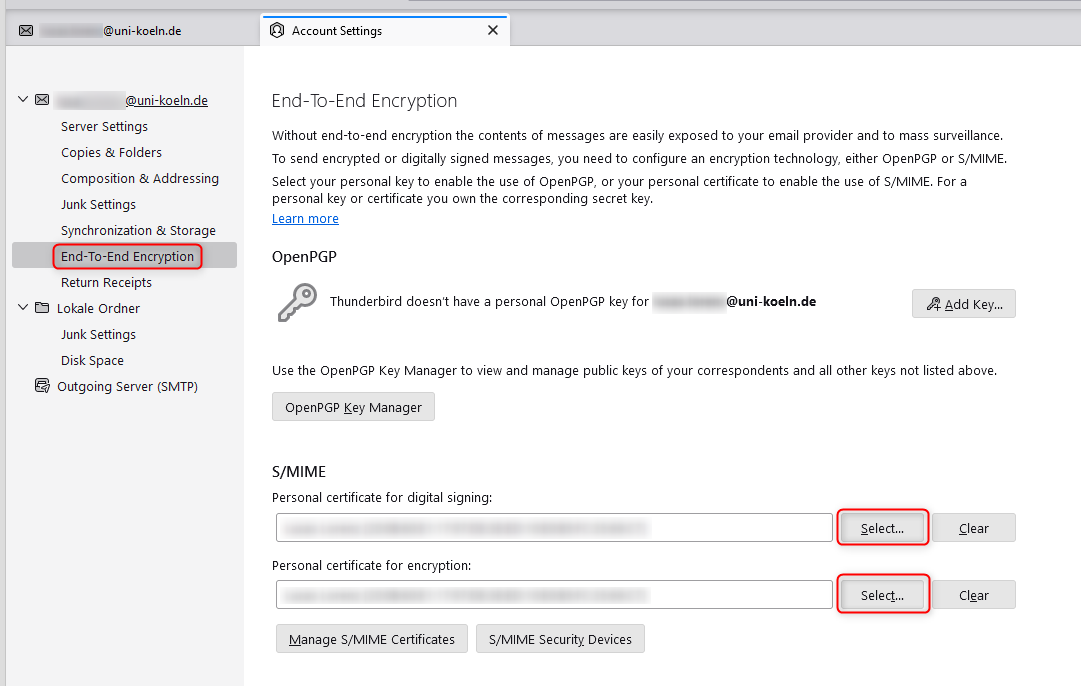
- Click on "Select" under "Personal certificate for signing". A certificate is now automatically suggested to you. If you have imported several certificates, you can select a specific certificate via the selection window. Then click on "Ok". Thunderbird will automatically ask whether this certificate should also be used for decrypting messages. As a rule, you can confirm this with "Yes".
- Now make sure that the default settings do not automatically use encryption for new messages and automatically sign unencrypted messages.
The setup is now complete and every new message from the corresponding e-mail account will be signed with the configured signature.
Encrypting e-mails in Thunderbird
Thunderbird automatically saves the certificates of the respective e-mail address. If encryption is possible, Thunderbird will inform you of this. Now click on "Encryption" at the top to activate encryption.
Important note for recipients of encrypted emails
[This content is not available in "Englisch" yet]
Please make sure that you keep all certificates that were used to send you encrypted emails. If these are removed, the mails can no longer be decrypted.
Contact
If you have any questions or problems, please contact the ITCC-Helpdesk


