Manually setting up an email account in Outlook
If the automatic setup of an email account in Outlook does not work as described on this page, you can follow these steps:
- Open the "Accounts Wizard" via the menu items File -> Information -> Add Account.
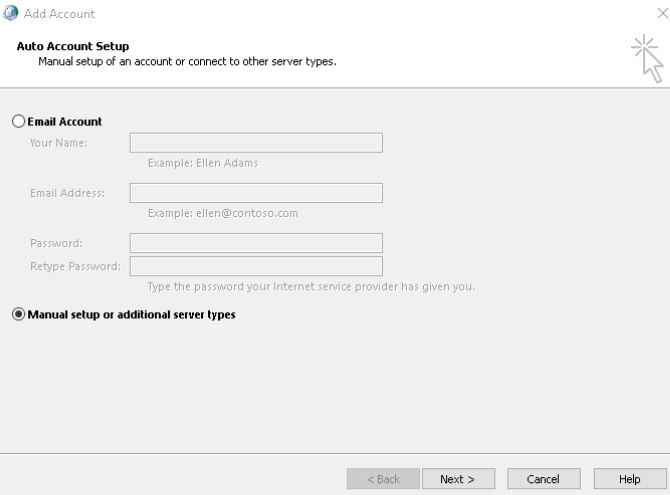
2. Click "Manual setup or additional server types" and then click "Next".
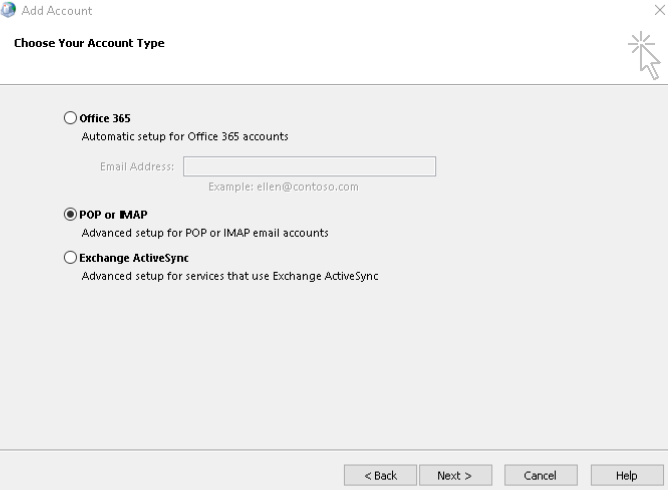
3. Select "Pop or IMAP" and click "Next".
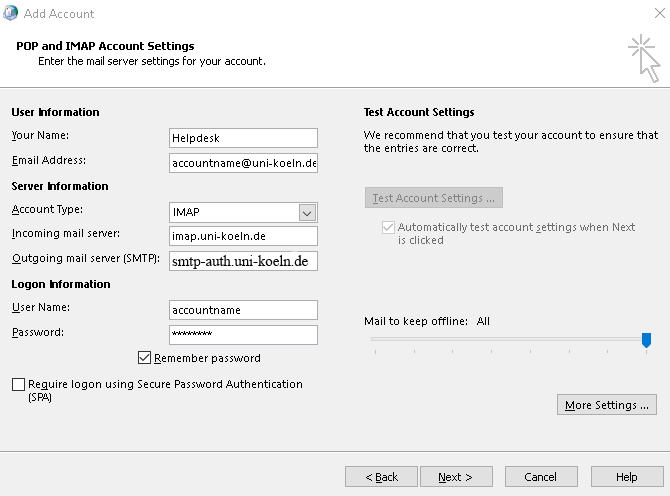
4. Make the entries as shown in the screenshot.
Please note the following instructions:
- Depending on whether you have a student account or staff -account, please make sure to use the appropriate format: identifier@smail.uni-koeln.de or identifier@uni-koeln.de.
- The identifier depends on which e-mail address you intend to use with Outlook and is one of two items: It can be (1) your user name (combination of up to eight letters and numbers) or (2) your name alias (usually in the format of firstname.lastname). Please note that use of an alias requires its previous registration in uniKIM. (LINK ZUM ALIASGUIDE) Both your user name and a name alias will work with Outlook.
- Unlike as for "e-mail address", only the identifier – without @smail.uni-koeln.de or @uni-koeln.de, respectively – must be entered for "User Name".
Afterwards, please click on "Additional Settings".
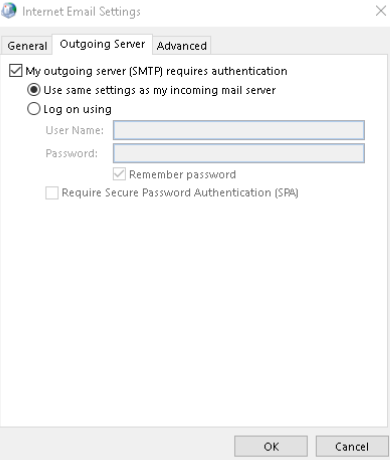
5. In the new window, navigate to the second tab "Outgoing Server" and check the box "My outgoing server (SMTP) requires authentication“.
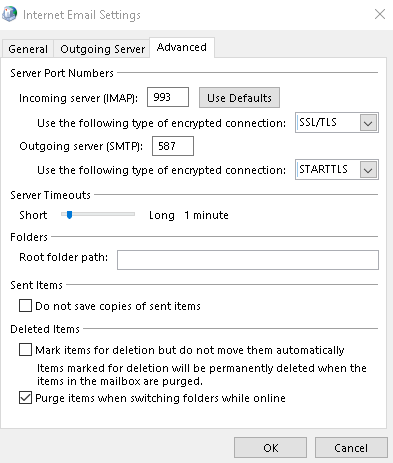
6. Now navigate to the "advanced“ tab and type in the following values:
| Incoming server (IMAP): 993 | Conntectiontype: SSL/TLS |
| Outgoing server (SMTP) 587 | Connectiontype: STARTTLS |
To save the changes you have made, click "OK". You will now return to the previous window.
7. Click on "Next" to create the new e-mail account
8. Afterwards you will receive a confirmation of the process and you can complete it by clicking on "Finish".
More instructions
Microsoft Outlook 2019
Manually setting up an email account in Outlook
Contact
If you have any questions or problems, please contact the ITCC-Helpdesk