Instructions for setting up your email account in Outlook 2019
Below we will show you how to set up your student or staff account in Microsoft Outlook 2019.
Unfortunately, there is currently a bug in Outlook 2019 that prevents automated setup. Therefore, more setup steps are required in Outlook 2019 than in previous Outlook versions.
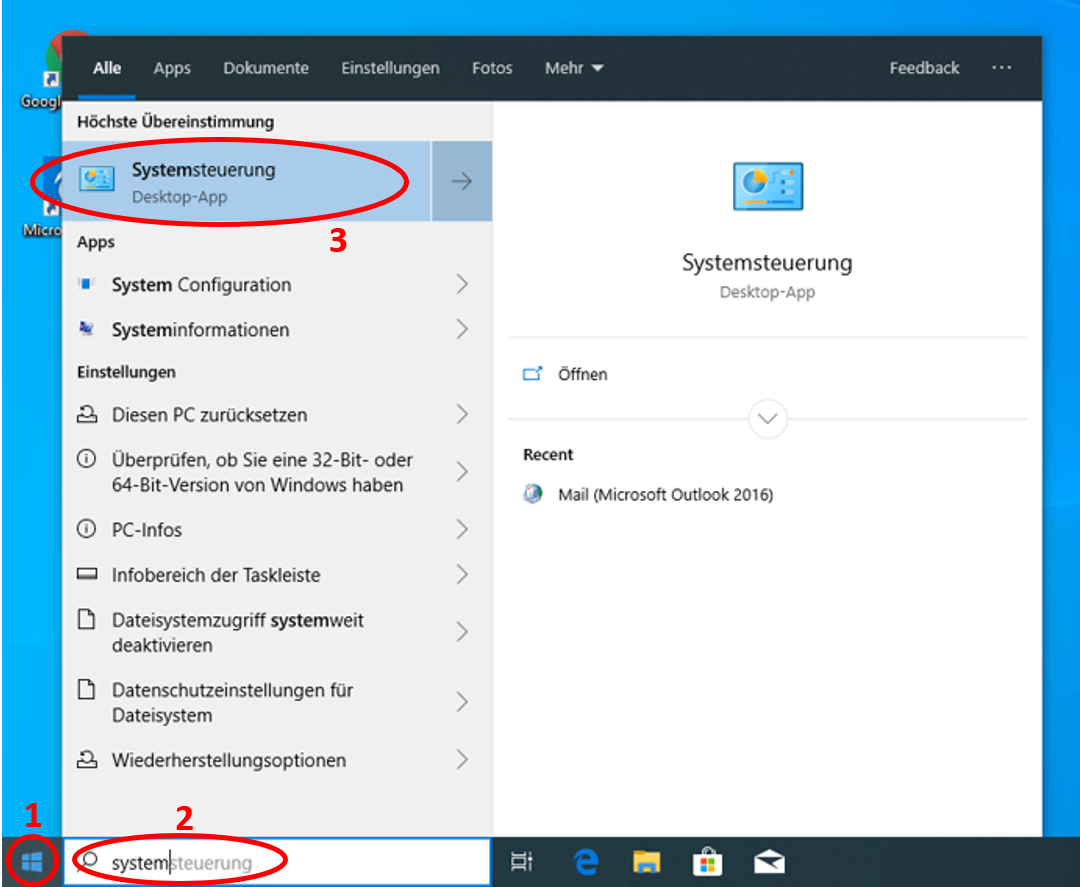
- [Figure 1] First, keep Outlook closed. Click on the Windows icon (1) at the bottom left and type "Control Panel" (2). As a search hit, you will now see the corresponding desktop app (3) at the top. Click on it to start it.
- [Figure 2: In the Control Panel, click on "Mail (Microsoft Outlook 2016)". (If this menu item is not displayed, select "Small icons" under "Display" at the top right.
- [Fig. 3+4] If you have reinstalled Outlook, you must now set up a profile. If there is none in the list (1), you can create one via "Add...". If a profile already exists, this step is not necessary and therefore does not appear. Instead, you will see the "Mail Setup" window [Figure 5]. Click on "E-mail accounts" here.
- [Figure 6] Now fill in the displayed fields and click on "Next".
- [Fig. 7] Under certain circumstances, a message for automatic configuration may be displayed. Click on "Allow" here. If a login window from Microsoft appears or a Shibboleth authentication is requested, please close this window by clicking the X without making any entries here.
- [Figure 8] If all entries were correct, your mailbox has been set up without errors. Remove the checkmark from "Set up Outlook Mobile on my phone as well" - if available - and click on "Finish".
- You can now open Outlook and use your mailbox.
More instructions
Microsoft Outlook 2019
Manually setting up an email account in Outlook
Contact
If you have any questions or problems, please contact the ITCC-Helpdesk
