Setting up Mail for iPhone
This instruction describes the configuration of the Mail-App on iPhones for student or staff accounts (address@smail.uni-koeln.de, address@uni-koeln.de). By this it is possible to receive, create and send E-mails on the iPhone at any time.
If needed you can find the most important server addresses down below.
IMPORTANT NOTICE:
- (1) This instruction will not work for E-mail addresses from Staff of the WiSo Faculty (address@wiso.uni-koeln.de). The required server addresses have to be asked for at the WiSo-IT.
- (2) This instruction will not work for other mail providers such as GMX, WEB.de or Yahoo. For the set up of those Accounts please refer to the server addresses of the providers.
Preliminary Notes
For a simple installation there are two prefabricated profiles down below. Before that you first have to decide which protocol you want to use for receiving E-mails.
You have the choice between the POP and the IMAP protocol:
What is POP and IMAP?
For the iPhone we recommend using the IMAP protocol.
Download
- Configurationfile for the IMAP Protocol (mobileconfig, 9 KB)
- Configurationfile for the POP Protocol (mobileconfig, 9 KB)
Download one of the profiles on your iPhone. Alternatively the Configurationfile can also be transfer on the iPhone via Mail.
NOTICE: The Set up for the E-mail account works identically for either profile (POP or IMAP). The following instruction shows an example with the IMAP protocol.
Instruction
![[This content is not available in "Englisch" yet] Screenshot](/sites/rrzk/user_upload/1_Profil_install_ios12_Bestaetigung-Download.png)
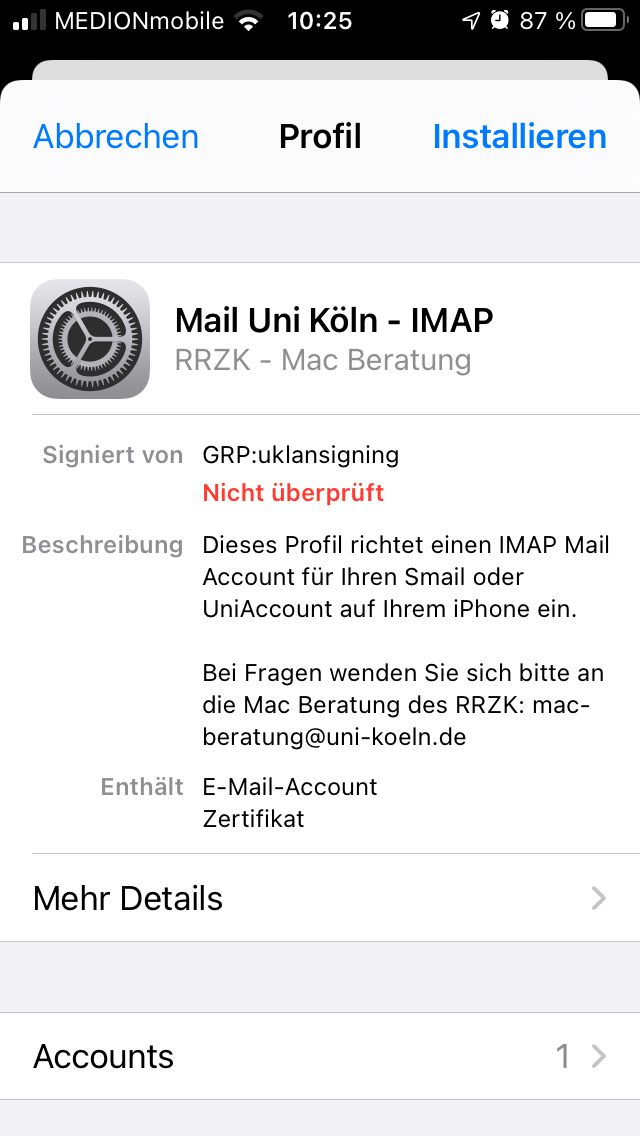
- After downloading the configurationfile on the iPhone, a window will pop up asking if the configurationfile is allowed to be shown. Please accept this by pressing "Allow".
- In case you got the file via E-mail please press on the profile in the E-mail.
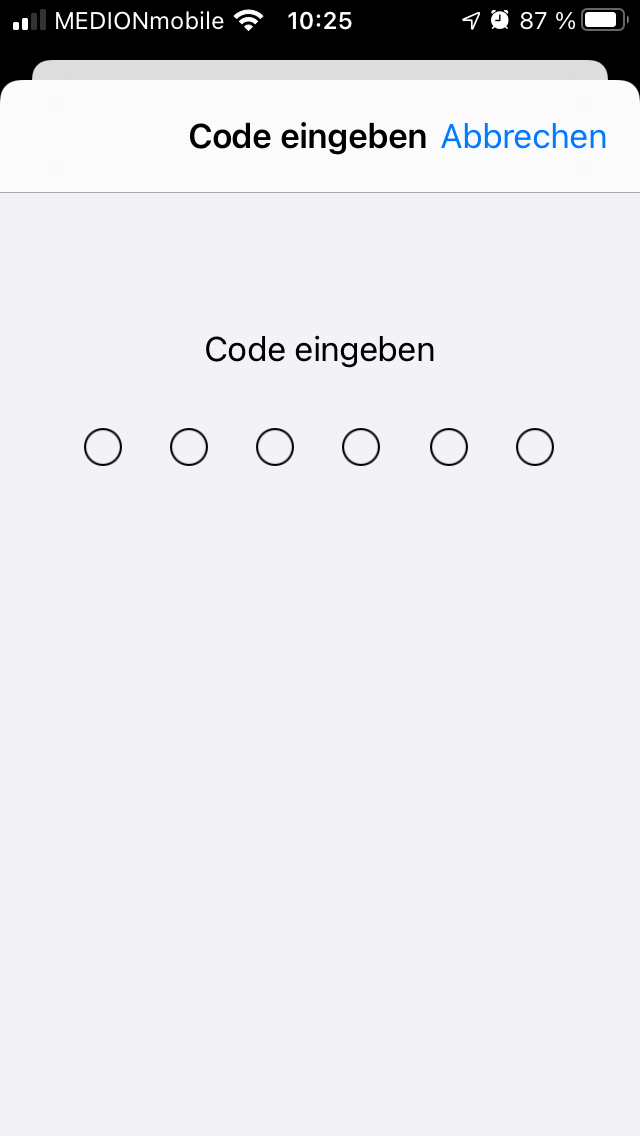
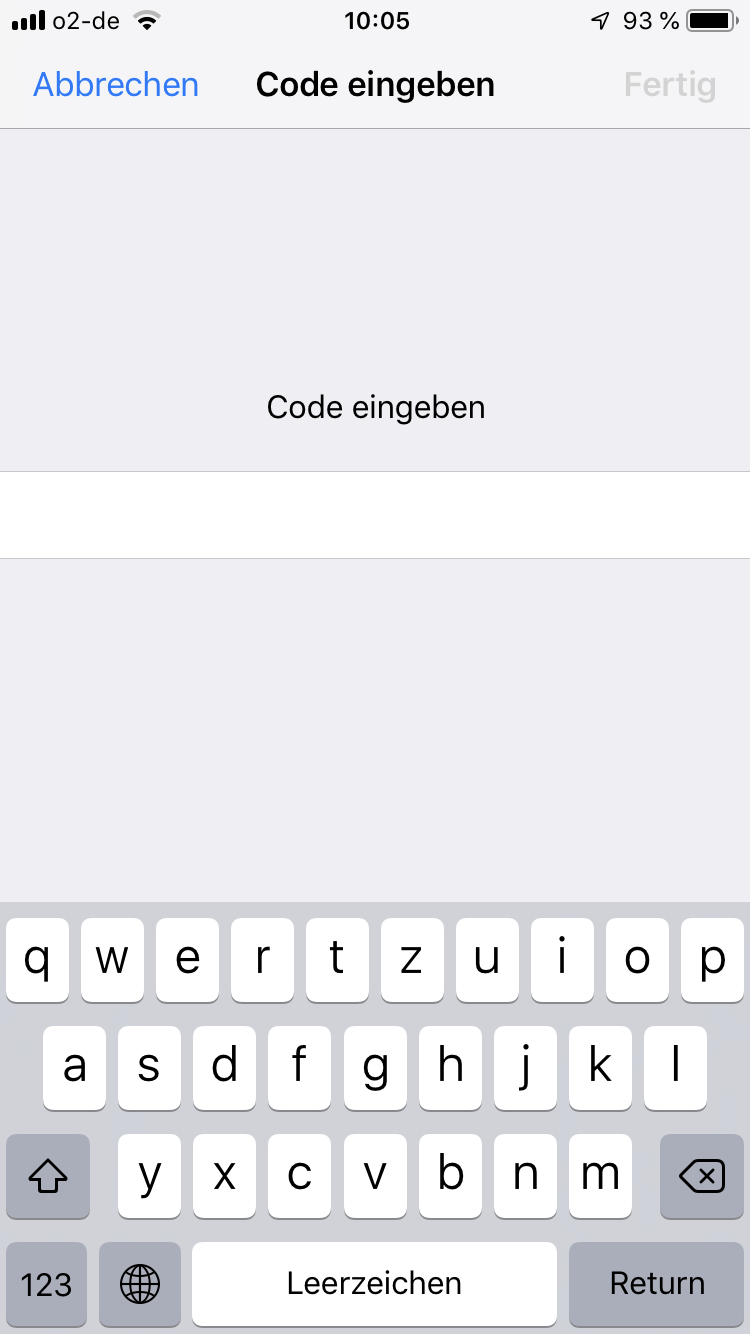
- By clicking on "Install" the configuration starts. You will be asked to enter the Unlock-Code from your iPhone. After entering the code please confirm by pressing "Done!". Proceed by clicking on the button "Install".
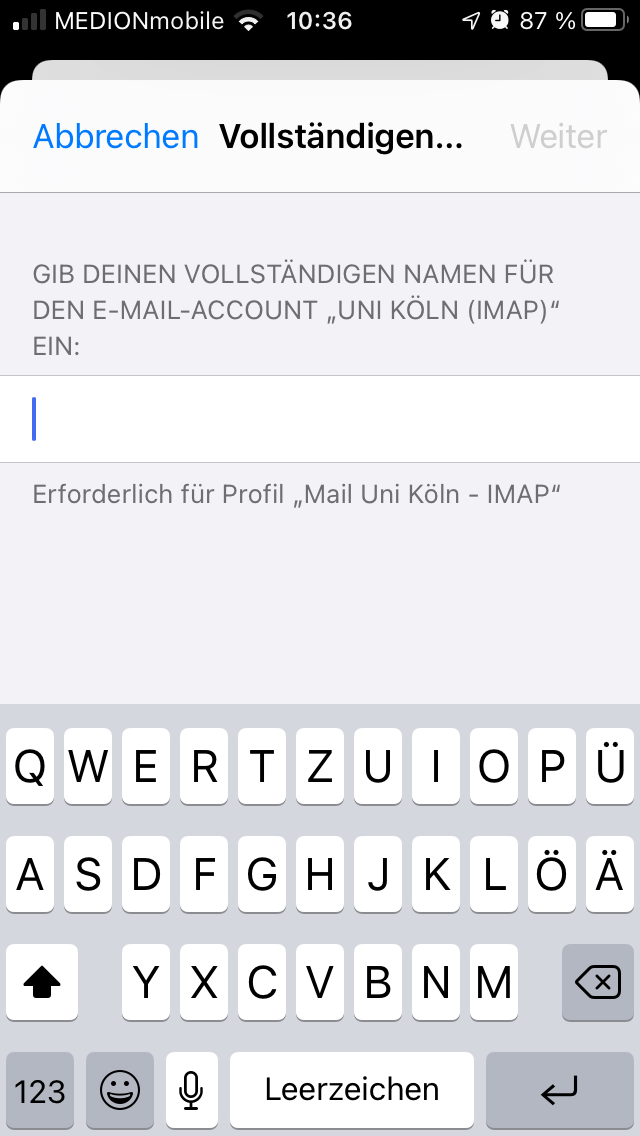

- In the following step you will be asked to enter a Description of your E-mail account.
- By this you can decide under what Name others will receive your E-mails. We recommend to enter your full name.
- Notice: You can change this afterwards.
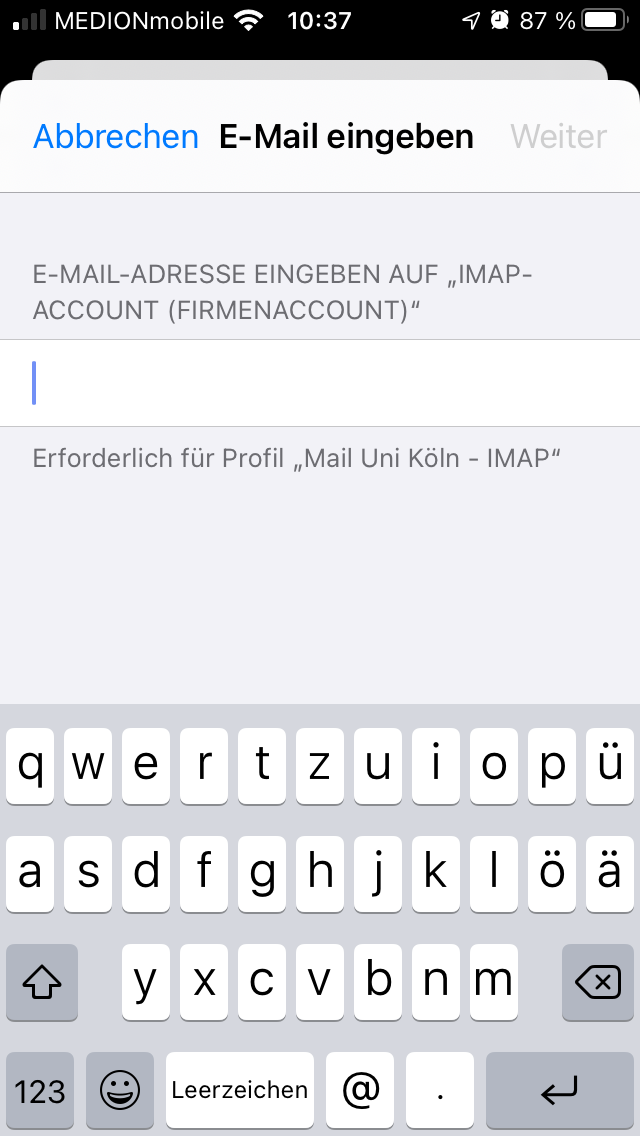
Now you have to enter your university e-mail address. Both profiles (IMAP or POP) work with student or staff accounts either way.
NOTICE: Make sure to enter the correct format of the e-mail address (for example):
- Student Account: username@smail.uni-koeln.de
- Staff Account: username@uni-koeln.de
To make the the following steps easier we recommend to copy the username (the part before the @-symbol). This will be required two more times in the following steps.
- Here you have to enter your username. If you previously copied the username, simply tap twice on the textfield and insert the username.
- In the next dialog please enter your private Password for your student or staff account.
- This step will now have to be repeated for the incoming and outgoing server (each one time) and looks almost identical.
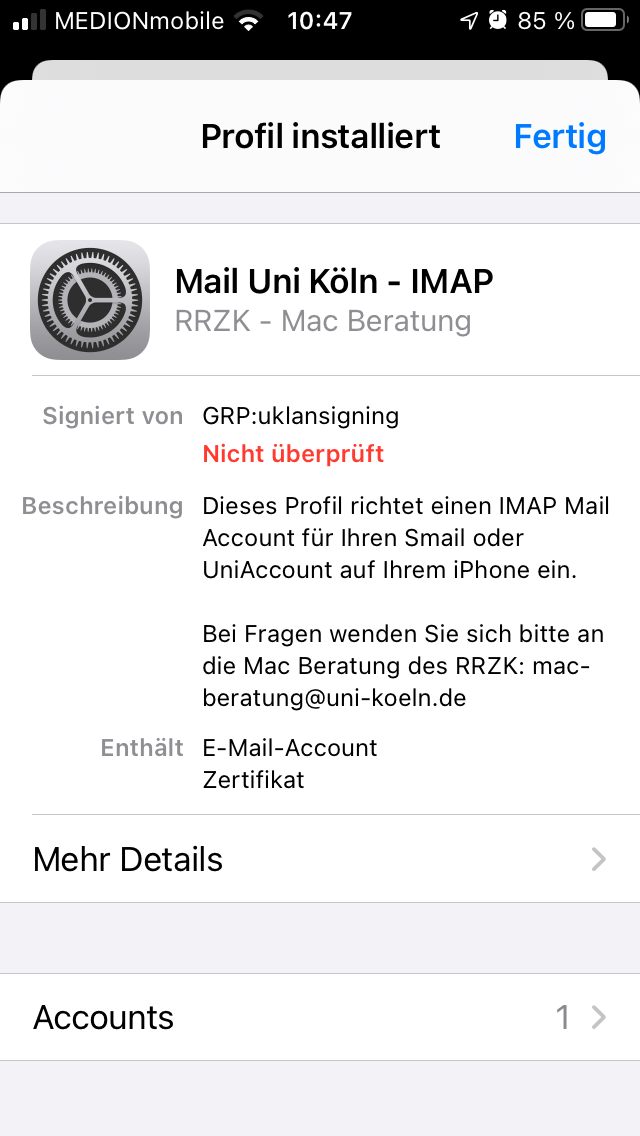
The configuration has now been completed.
Close the Assistant by clicking on Done.
At the end you will be directed to your Inbox. Here you can now see the previously configurated Account and you can now receive and send E-mails! The Account will be named accordingly to the chosen protocol either Uni Köln (IMAP) or Uni Köln (POP).
Editing the configuration afterwards
To edit the configuration (for example the description of the E-mail address or the accountname in the inbox), please navigate to the Settings of your iPhone. From there you scroll down to Mail and then on Accounts where you can choose the Account you want to edit.
Here you can make the following changes.
- Name: The Name that others will see when receiving a mail from you
- Description: The name of the Account in your Inbox (initially "Uni Köln (IMAP or POP)")
NOTICE: Please do not change any of the other Information!
Remove Account / Profile
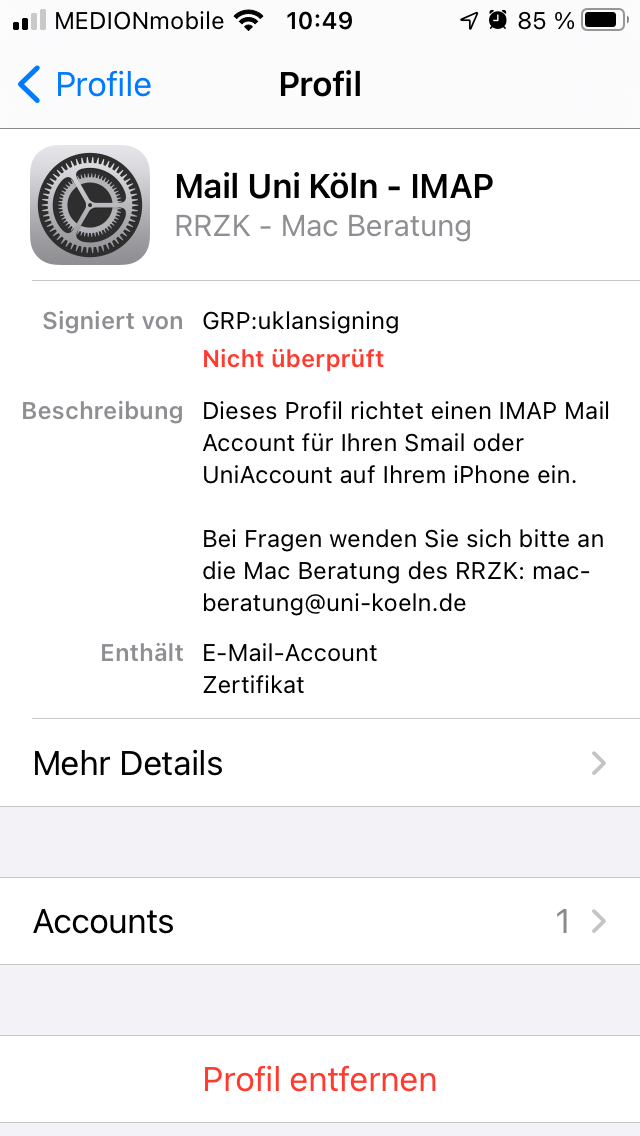
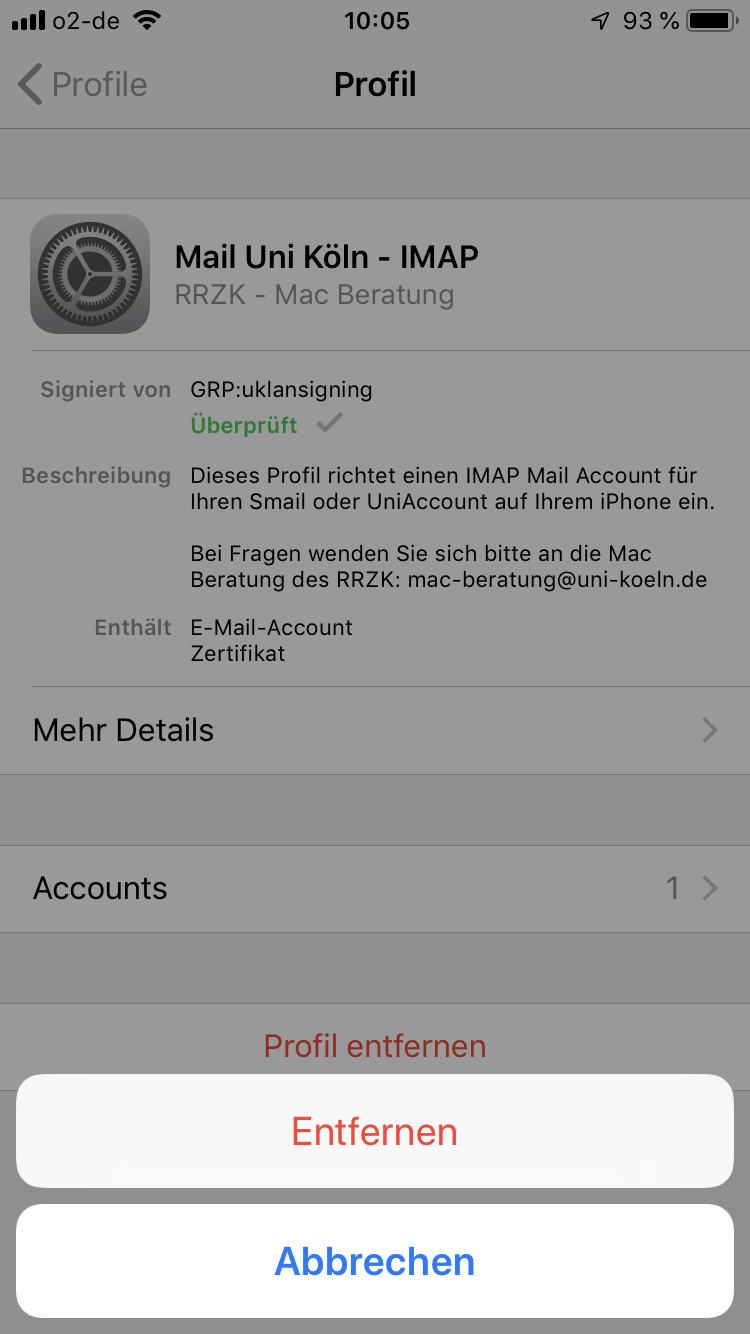
To remove the installed Account, simply remove the according profile.
For this you can navigate to your iPhone Settings and then to General. Choose VPN & Device Management further down. A list of all profiles installed on your iPhone should appear.
When choosing the Mail profile (Mail Uni Köln - IMAP/POP) you can click on Remove to delete the Account completely from your iPhone. You will be prompted to enter your iPhone Unlock-Code and to confirm that you want to delete the Profile.
Manual setup for Mail on the iPhone
Step 1: Open the Settings app on your iPhone.
Step 2: Scroll down and tap on “Mail”.
Step 3: Select “Accounts” or “Accounts & Passwords”, depending on your iOS version.
Step 4: Tap on “Add account”.
Step 5: Select “Other” as IMAP is not a default option.
Step 6: Select “Add mail account”.
Step 7: Enter your name, e-mail address and password.
Step 8: Enter a description for your account and tap “Next”.
Step 9: Select “IMAP”.
Step 10: Enter the server settings for incoming and outgoing emails. IMAP server: “imap.uni-koeln.de” and the SMTP server: “smtp-auth.uni-koeln.de”.
Step 11: Enter your user name (without @smail.-/@uni-koeln.de) and your password for both IMAP and SMTP.
Step 12: Tap on “Next” and wait while your iPhone checks the server settings.
Step 13: Select the data you have synchronized (e-mails, contacts, calendar, etc.).
Step 14: Tap “Done” to complete the setup.
Your IMAP email account is now set up on your iPhone and should be available in the Mail app.
Contact
If you have any questions or problems, please contact the ITCC-Helpdesk