Conversations and channels
Start conversation
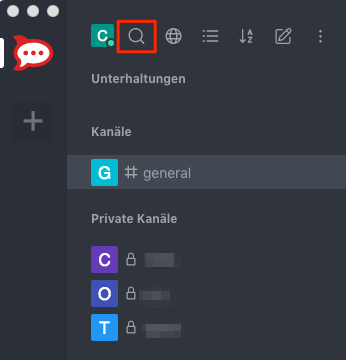
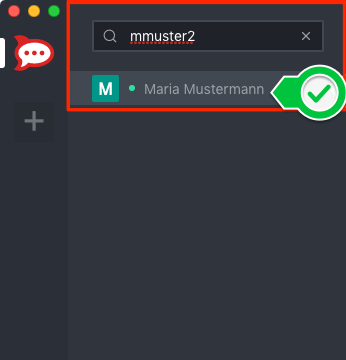
- To start a new private conversation, use the magnifier icon in the top bar to find the person concerned.
- By clicking on the person’s name, the new conversation appears in the right-hand box.
Create channels

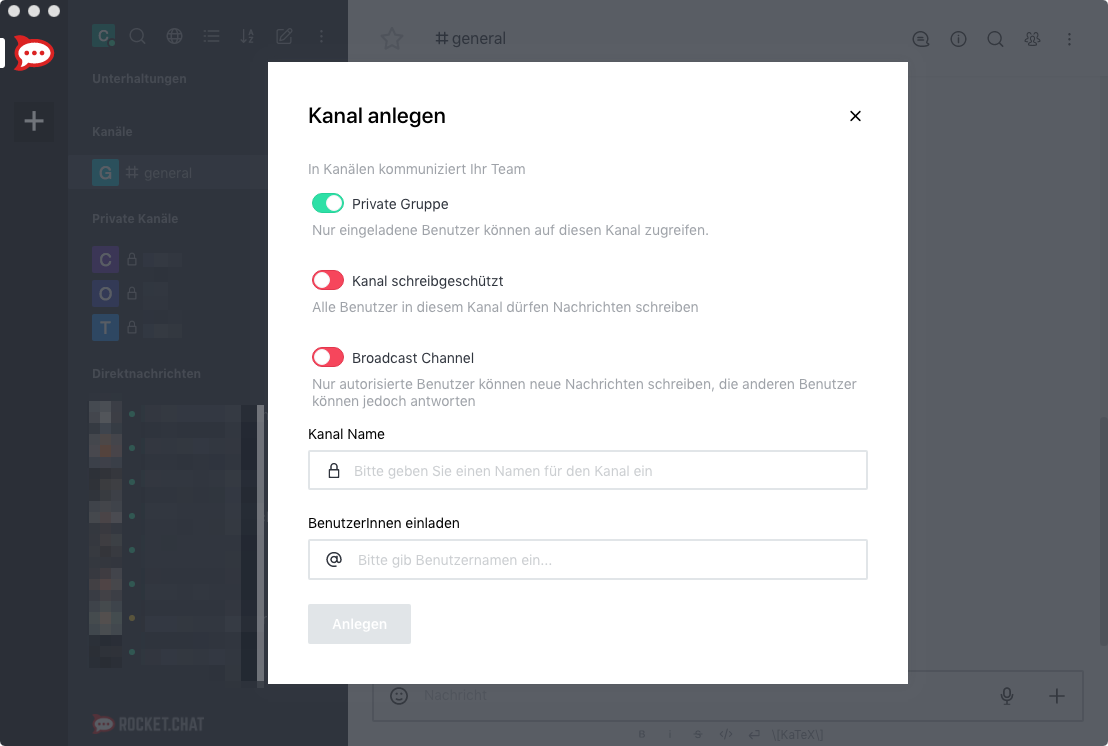
You can create channels for your team for the purpose of internal communication and invite team members to join.
Please only create private channels!
Channels in which only specific users can post messages are also possible. These can be used, for example, to share information. The remaining users will only have read access.
Efficient group work with Rocket.Chat
Addressing specific persons in a private group
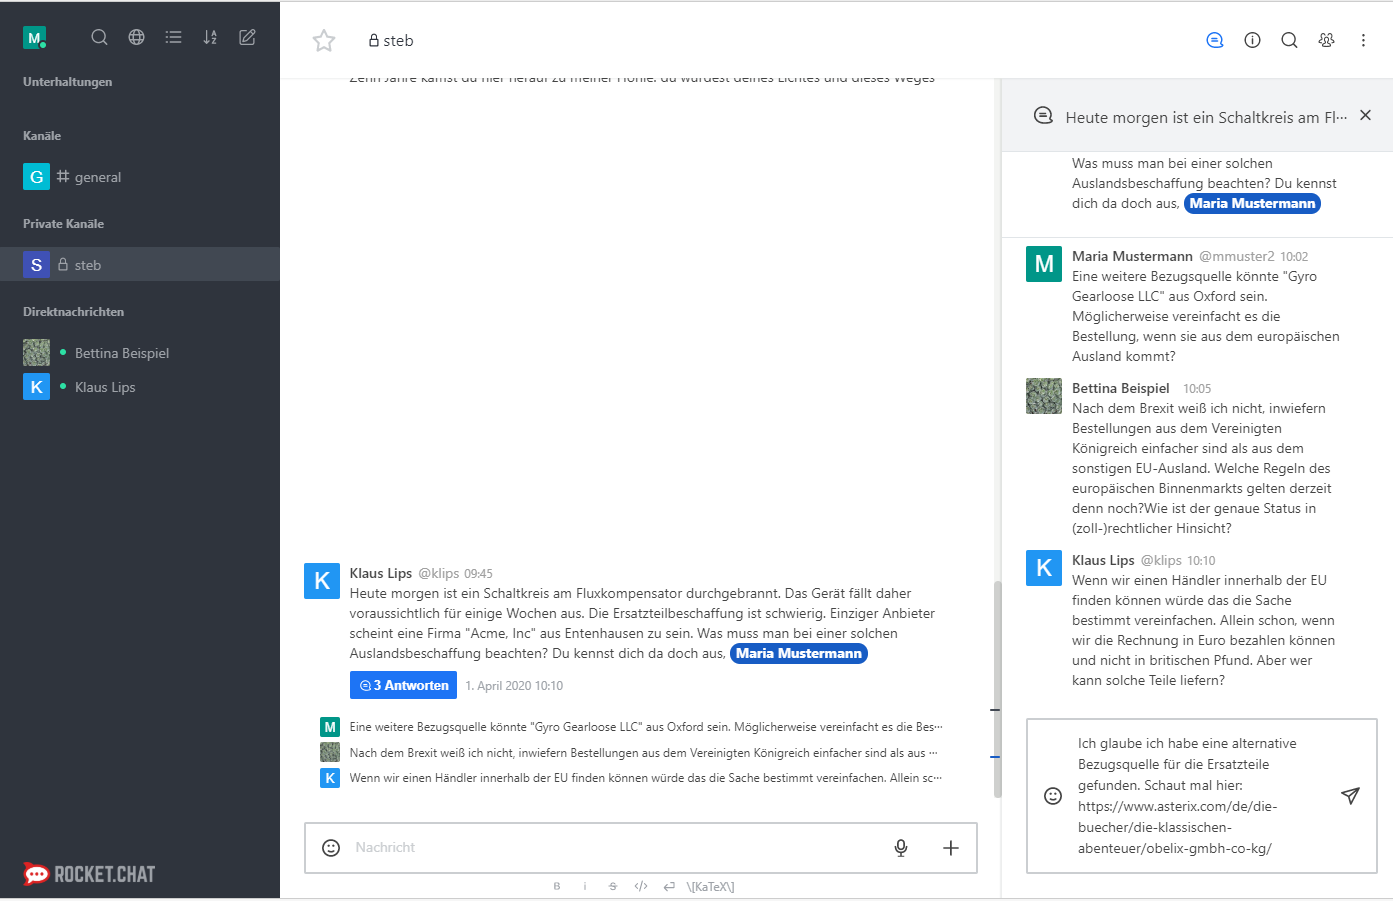
Suppose you want to post a message to a group, but you would also like a specific person to react to it. To trigger such a reaction, you can add a mention of this person to you message. You just need to enter the first letters of the person’s username until the person concerned appears from the list of registered users.
To add such a mention, type the "@" symbol on your keyboard, followed by a few letters of the username. For example, to specifically address Maria Mustermann, whose username is mmuster2, enter: @mmu
A window with name suggestions will appear. You may use the mouse to click on one of the suggested names. Alternatively, using only the keyboard, select one of the suggested names by pressing the cursor keys (up/down) and press the tab key to confirm the name you want.
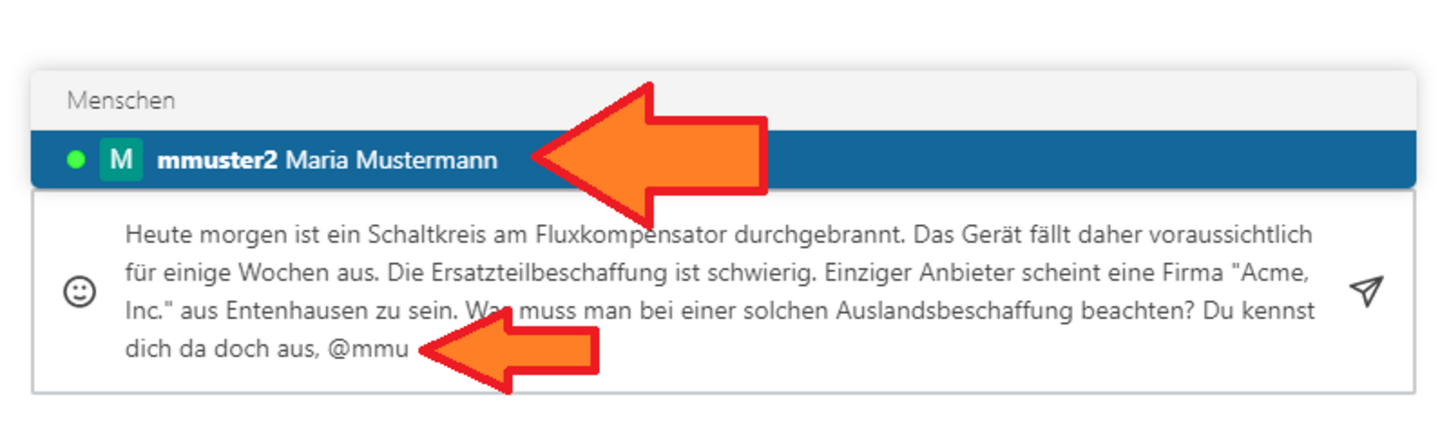
If you post a message with such a mention, the addressee’s name is highlighted. For the person concerned, their name appears against a dark-blue background. For all other recipients of the message, the name appears against a light-blue background.

Apart from highlighting a specific person, you can also indicate in your message that it concerns all team members and you hope that they will all respond. To do this, write "all" after the "@" symbol instead of a username, i.e. @all.

Organizing chats by topic
For a better overview, specific topics within a chat channel can be divided into discussion “threads”. Through this function, colleagues for whom a specific topic does not apply can focus more easily on those that concern them.

To create a thread, reply to an existing message. How to do this varies, depending on the client you are using:
-
In the desktop client, select the message to which you want to reply and click on the icon with the speech bubble and two lines ("Reply in thread") in the top right-hand corner.
-
In the mobile client, tap for a while on the message to which you want to reply and then select "Reply" in the menu that appears.
The messages within a thread are displayed in the channel in the default view in a small font size. Click on the blue button n Replies. All the chat messages related to this thread are now displayed in full length. If the blue button is already scrolled out of the window, as an alternative you can click or tap on one of the abbreviated messages of a thread to display this thread’s messages in full.
To reply in this thread:
-
In the desktop client, enter your reply in the right-hand sub-window in the "pale" area.
-
In the mobile client, enter your reply while the thread is displayed. (Tap the "Back" button if you want to reply outside this thread or in another thread.)
Via the "Bell" or the "Bell with slash" icon, you can decide whether you want to be notified of new messages in this thread or not.
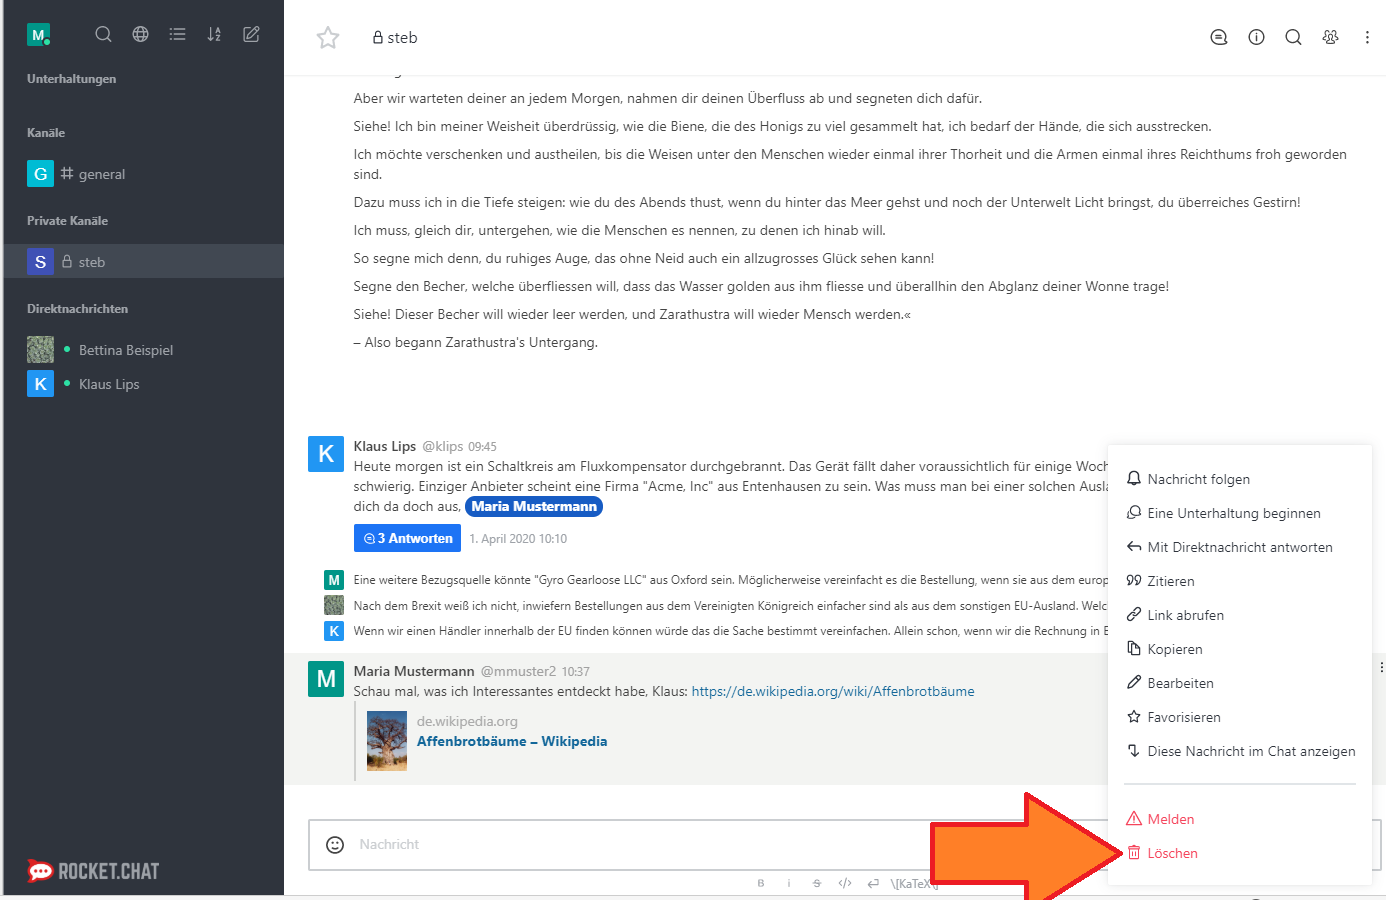
Deleting messages
You can retroactively delete messages in a chat which you did not actually want to send (e.g. you sent them too soon or to the wrong person). Of course, you can only delete your own messages and not ones written by someone else.
To delete a message:
-
In the desktop client, move the cursor to the respective message and select the menu in the top right-hand corner (three vertical dots). Select the last point Delete (trash can icon).
-
In the mobile client, tap for a while on the respective message. Select the last point Delete in the menu that appears.
Alternatively, you can not only delete messages but also edit them retroactively. To do so, follow the instructions above, but instead simply select Edit in place of Delete. You can then post your edited message again. A message edited retroactively in this way is displayed in the chat with a pencil icon.
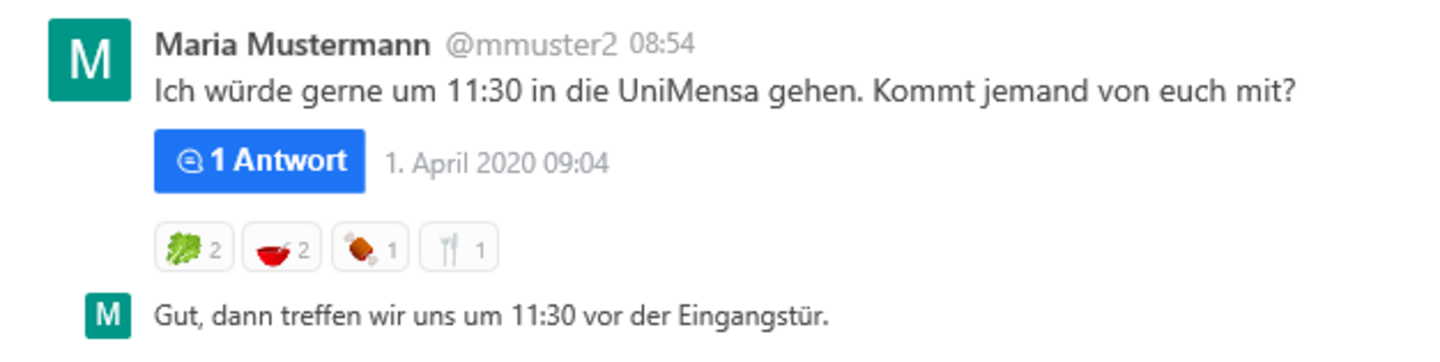
Reactions to messages
You can add a reaction in the shape of an emoji to a message posted by someone else. In the desktop client, move the cursor to the message and select the icon "Smiley face with plus sign" in the top right-hand corner. In the mobile client, tap for a while on the message and select "Reactions" in the menu.
Apart from general comments, for example whether a message was witty or inappropriate, this function is a simple way to collect a group’s opinions.
Example: You suggest the following:
| I could hold a presentation at our team meeting next Wednesday and give you some details. Is anyone interested? |
Your colleagues can respond to your suggestion by adding emojis to signalize whether they are interested, e.g. with a "Thumbs up" or a "Thumbs down" icon. As soon as one person has clicked on such an icon, other people can click on it too if they are of the same opinion. The number of clicks on the icons is counted. In this way, the group’s opinion can be quickly gauged, particularly in the case of a simple Yes/No question.
In case you accidentally clicked on a reaction symbol, you can undo this by clicking it again.
Surveys with predetermined responses

In addition to surveys where respondents give their own answers (in the form of symbols), surveys can also be conducted with predetermined response options. Such a survey is created by using the keyword /poll in the text input field. You can then enter the question that should be answered.
For example, instead of going to the cafeteria, you want to place a pizza order together. In this case, you could enter the following in the text field:
/poll What toppings should be on the pizza?
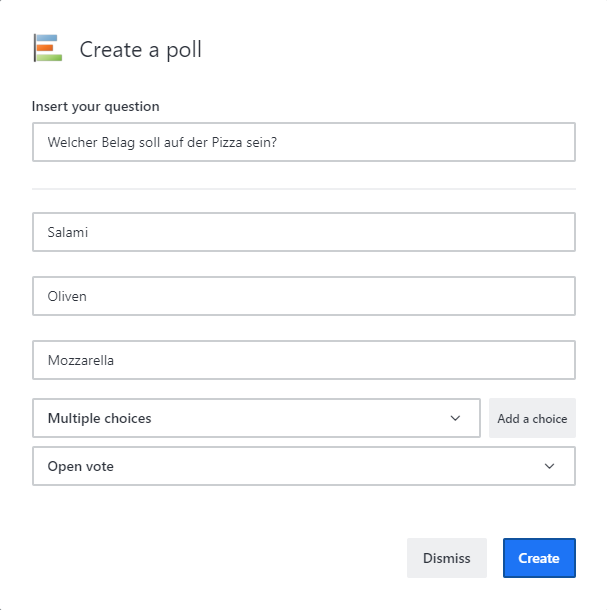
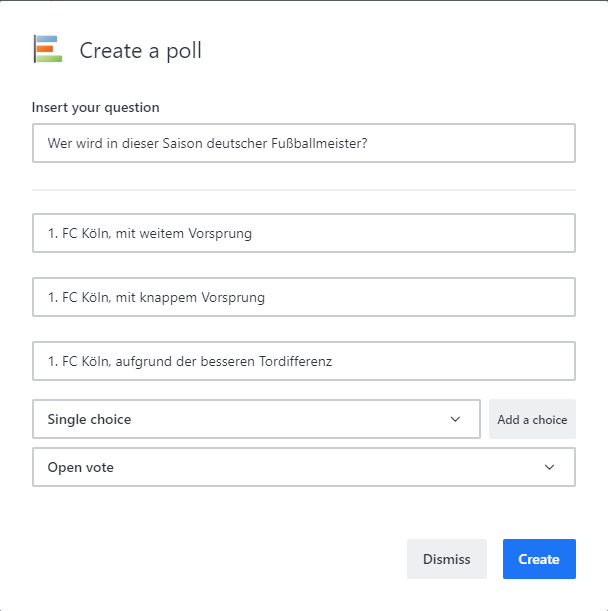
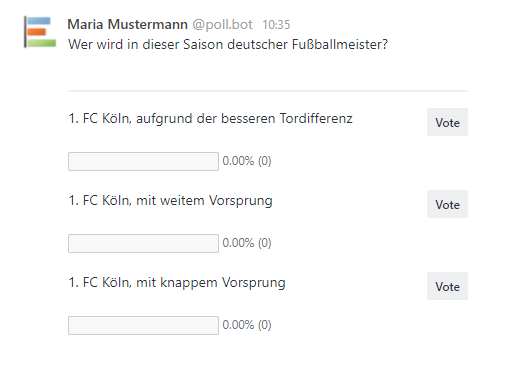
After entering /poll, an input mask will appear where you can provide additional information about the survey. You can enter possible answer alternatives in the open fields. If necessary, you can add more fields for response options using the Add a choice button. In the selection box below, you can choose whether participants can click on multiple of your predetermined response options (Multiple choices) or only one of the response options (Single choice). You can use the last selection box to specify whether all participants can see how each person voted (Open vote) or if the voting behavior should be kept secret (Confidential vote). You can publish the survey in the selected chat channel using the Create button. When it is time to stop accepting votes, the survey can be closed using the Finish poll option in the context menu (three vertical dots next to the survey).
Participants can retract a previously given answer, similar to "responding" with emojis, by clicking on the Vote button again next to the previously selected response option.
Direktes Verlinken von OTRS-Tickets
Um in Unterhaltungen Tickets aus dem OTRS-Ticketsystem der Uni Köln zu referenzieren, können Sie die Kurzform
/otrs ticketnummer
verwenden, also bspw.
/otrs 181234567
Contact
If you have any questions or problems, please contact the ITCC-Helpdesk