Instructions for connecting to the SoFS storage
Setting up SoFS under Windows
A connection to the UKLAN (via eduroam, LAN or VPN) is required to connect to a SoFS drive in this way. Instructions for connecting to the VPN network can be found here.
- Open Windows Explorer by clicking on the folder icon at the bottom of the taskbar. Tip: Alternatively, you can also press Windows key+E on the keyboard to open the Explorer. Now right-click on the “This PC” tab in the left-hand column and then click on the “Map network drive” entry [Fig. 1].
- Under “Folder”, enter the path of the SoFS drive to which you want to connect. The drive letter is freely selectable [Fig. 2].
- a user's private drive is located at \\sofs1.uni-koeln.de\[account name]
- The public drive of a user is located at \\sofs1.uni-koeln.de\public\[initial letter of the account name]\[account name]
- You can obtain paths for institute drives from your institution (usually \\sofs2.uni-koeln.de\[name])
- Activate the option “Connect with other credentials” and then click on “Finish”. If you want your device to connect automatically after starting Windows tick the box “Reconnect at sign-in”. (Fig. 2.].
- Type in your user data in form “ad\[account name]” with the corresponding password. If the field for entering the user name is grayed out, click on More options below and activate the option “Use another account”. If you want to be automatically connected to SoFS every time you start the computer, activate the option “Save login data”.
- Then click on “Finish”. You will now find the drive under the drive letter you selected.
You can find detailed instructions for setting up under Windows 10 here.
Setting up SoFS under MacOS
The prerequisite for using CIFS is that the computer is located in the University of Cologne network. This applies to stationary devices (Mac Pro, iMac, Mac mini) in the institutes and facilities on campus or Macs that have previously established a VPN connection to the university network.
- To establish a connection to the SoFS, open the Finder. Then click on “Connect to server” in the “Go to” menu (alternatively, you can also use the keyboard shortcut ⌘ + K(Command and K)).
- Enter the address of the SoFS server in the “Server address” field in the following form:
- For a “Private” directory: smb://sofs1.uni-koeln.de/[account name]
- For a “public” directory: smb://sofs1.uni-koeln.de/public/[first letter of account name]/[account name]
- For the SoFS areas for institutions: smb://sofs2.uni-koeln.de/projects/[path to the SoFS area of the institution]
- Enter a server address according to the above scheme and replace the placeholders in square brackets with the account name of your student or staff account. You can use the “+” button to save an address once it has been entered so that you can retrieve it directly from the list in future.
- Click on the Connect button.
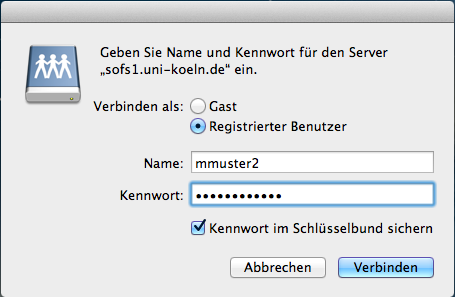
- Enter the user name and password of your student or staff account in the login window. (Logging in as a guest will not work).
Whether you check or uncheck Save password in keychain depends on the level of security you are aiming for. If the password entry was correct, a window with the content of the selected area is now displayed in the Finder. If you enter an incorrect user name or password, you will see the typical “head-shaking window”. - To terminate the connection to the SoFS once you have finished your work, click on the eject symbol next to the server name (marked with a red arrow in the illustration).
Setting up SoFS under Linux
To set up SoFS on your Ubuntu, make sure that you are in the UKLAN, i.e. that you are connected to the University of Cologne network either via eduroam, VPN or via the Ethernet connection.
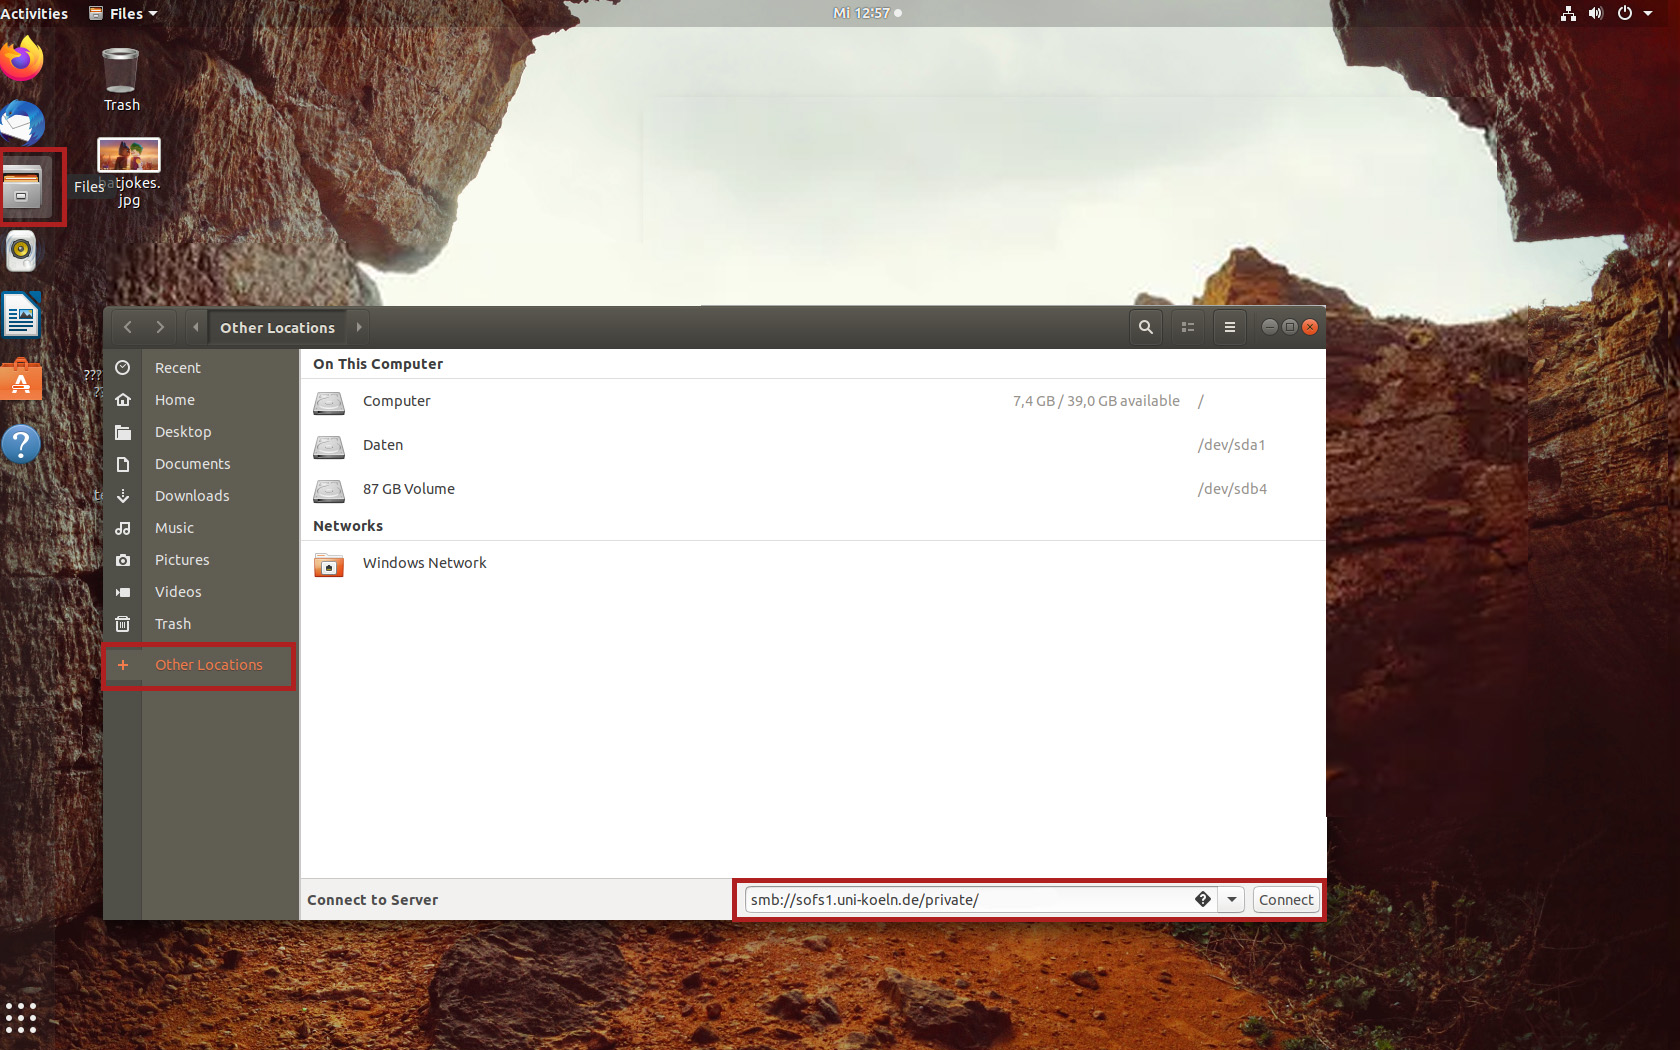
- Open the file manager in Linux and click on “Other Locations”.
- In the lower bar (“Connect to Server”) you can enter a network path. Enter the corresponding SoFS path there:
- personal private area: smb://sofs1.uni-koeln.de/private/[username]
- personal public area: smb://sofs1.uni-koeln.de/public/[first letter of account name]/[account name]
- For institutions: smb://sofs2.uni-koeln.de/projects/[path to the SoFS area of the institution] | smb://sofs.uni-koeln.de/[path to the SoFS area of the institution]
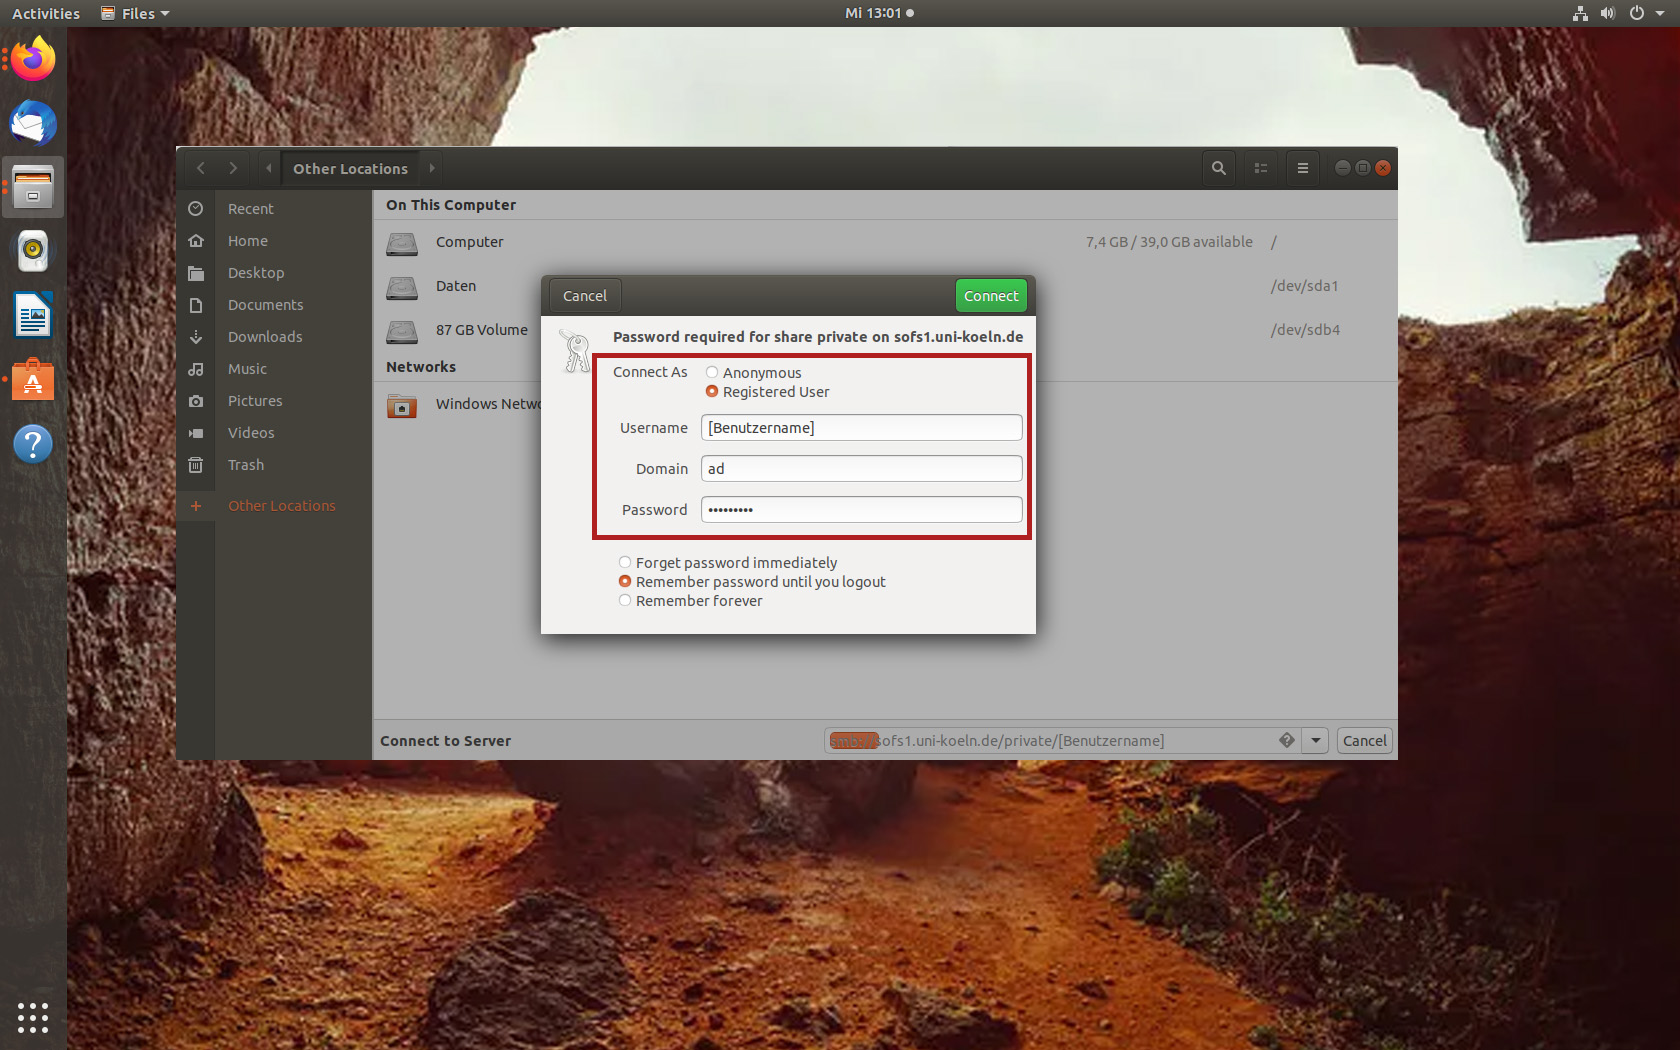
- A new window will now open. Click on “registered user” under “Connected as”. Enter your user name under “Username” and “ad” under Domain/Domain. Below this, enter your personal account password. Click on “Connect” at the top right to connect to SoFS.
Problems during setup
If there are problems with the connection, first try to remove the existing connection, if created:
- In Windows, open File Explorer and right-click on the relevant SoFS drive and click on “Disconnect” in the context menu.
- On your Mac, click on the eject icon next to the server name (marked with a red arrow in the illustration).
- In Linux, click on the eject icon in the file manager in the left bar next to the corresponding path entry.
Then restart the device once and try to re-establish the SoFS connection.
- Use the troubleshooting instructions.
Alternative access methods
Access via browser
Contact
If you have any questions or problems, please contact the ITCC-Helpdesk


